

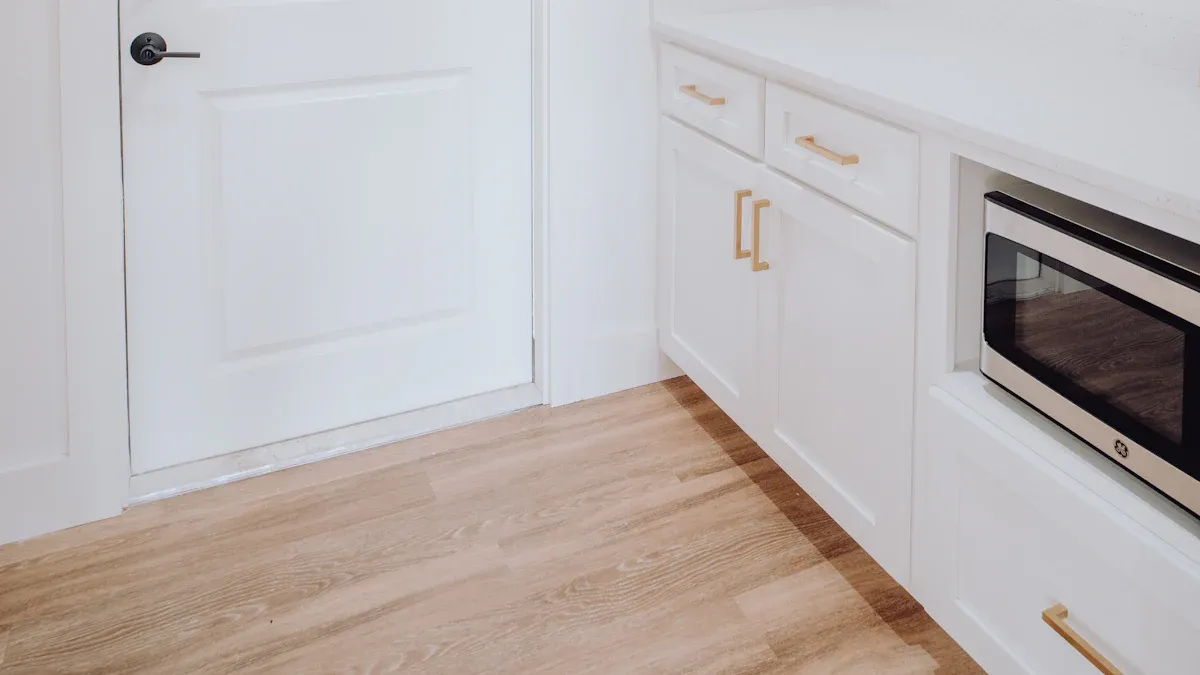
You can drastically change your home’s look with white trim. A fresh coat of white paint instantly brightens and modernizes any room. This simple update also increases your home’s perceived value. This guide shows you how to paint wood trim white for a professional, durable finish. Achieving that clean white trim aesthetic you desire is easy. This home painting project is accessible and impactful. You will master painting techniques for lasting white results. Painting trim white transforms your space.
Why Paint Wood Trim White
Painting your wood trim white offers many benefits. You will see immediate improvements in your home’s look and feel. This simple change makes a big difference.
Instant Home Transformation
White trim provides a clean and timeless look. It instantly brightens any room. This classic choice creates maximum contrast without competing with other design elements. Your spaces will feel fresh and bright. White trim prevents bold combinations, like black doors, from looking too stark. It also maximizes the feeling of space in smaller rooms. Rooms with limited natural light benefit greatly. White trim eliminates visual interruptions and reflects more light. This makes rooms feel larger and more open. You create a neutral, gallery-style backdrop. This allows your artwork or colorful furnishings to stand out. The sophisticated look comes easily, especially with moderate contrast elements.
Increased Home Value
Updating your trim to white can increase your home’s perceived value. Potential buyers often look for bright, modern spaces. White trim signals a well-maintained home. It offers a fresh, updated aesthetic. This makes your home more appealing on the market. You invest in an upgrade that pays off.
Versatile Decor Style
White trim works with any decor style. It complements traditional, modern, or farmhouse designs. You can change your wall colors or furniture. The white trim will always match. It provides a consistent, clean line throughout your home. This versatility makes painting trim white a smart choice. You get a cohesive look that adapts to your changing tastes.
Essential Tools and Materials
Gathering the right tools and materials is crucial before you start painting. Having everything ready ensures a smooth and efficient process. You will achieve a professional finish when you use quality supplies for your white trim.
Cleaning and Prep Supplies
You must clean your wood trim thoroughly. This step removes dirt and grime.
Non-soapy detergents like Dirtex, Spic & Span, or TSP No-Rinse Substitute work well for general cleaning.
Use heavy-duty cleaners for tough stains.
Apply specialty cleaners for marks from markers, ink, or crayons. This prevents bleed-through later.
Sanding Tools
Sanding prepares the surface for paint adhesion. You need various grits of sandpaper.
Start with 120 grit sandpaper. This removes peeling paint and rough spots.
Smooth surfaces and blend repairs using 180 grit sandpaper.
Perform a final sanding with 220 grit sandpaper. Do this before you apply primer and paint.
Taping and Protection
Protect surrounding surfaces from paint. Use painter’s tape to create clean lines. Drop cloths or plastic sheeting will cover floors and furniture.
High-Quality Primers
A good primer is essential for painting trim, especially when you want a bright white finish. Stain-blocking primers prevent wood resins or stains from bleeding through your topcoat.
Oil-based primer (e.g., Benjamin Moore Prime Lock Plus): This is often the best choice for durability on wood trim. It blocks crayons, smoke damage, odors, and various stains effectively. Ensure good ventilation when you use it.
Water-based primer (e.g., Aqua Lock Plus): This offers a strong alternative if you prefer not to use oil-based options.
Shellac-based primer (e.g., Zinsser BIN): Use this for very stubborn stains that other primers cannot block.
Recommended Trim Paints
Choosing the best trim paint ensures durability and a beautiful white finish. For the final coats, you should use quality latex semi-gloss paint.
Satin Sheen: This provides a velvety glow. It hides minor flaws better than semi-gloss. It is durable and easy to clean.
Semi-Gloss Sheen: This is highly durable and moisture-resistant. It is easy to clean and enhances architectural details.
Enamel Paint: This is often the best option for trim. It dries smooth and hard, offering maximum durability. Examples include Benjamin Moore Advance or Sherwin Williams Urethane Trim Enamel.
Brushes and Rollers
Select the right tools for smooth paint application.
Brush Size (mm) | Ideal for Trim Profiles/Tasks |
|---|---|
12-25 | Timber trim, small jobs, touch-up work |
38 | Window frames, moldings, furniture, small panels |
50 | Doors, screens, tabletops, railings, cabinets |
75 | Skirtings, fascia’s, fence posts and rails, floorboards, steps |
For oil-based paints, use a solid, medium-length bristle brush. For acrylic paints, choose a long bristle brush with synthetic bristles. This gives you a smoother finish. For rollers, a short roller (5-8mm thick) is best for glossy paint and smoother finishes.
Caulk and Wood Filler
You will need these for repairs.
Latex wood fillers are good for interior projects. They work well for trim and molding joints. They are flexible and easy to clean with water.
Water-based wood fillers are versatile for interior use. They dry quickly and clean easily. Use them for small repairs or nail holes.
Painting Wood Trim White: Step-by-Step
You are ready to transform your home. Follow these steps to achieve a professional, lasting finish when you paint wood trim white.
Prepare and Clean Trim
Proper preparation is key to a successful painting project. First, you must clean your wood trim thoroughly. This removes dirt, grime, and any loose particles.
Scrape off old peeling paint. Use a stiff, flat putty knife or pull scrapers.
Clean the trim with a mild solution. Use dishwashing liquid and a scrub brush or grout sponge. Apply significant effort.
Rinse the trim thoroughly. You can use a garden hose if the trim is removable.
Allow the trim to dry for at least two days before painting.
Inspect the trim again. Scrape any newly loosened paint spots.
Alternatively, use a damp sponge to clean dirt and grime. If needed, use the rough side of the sponge.
Consider using a liquid deglosser. This product helps rough up the surface. It improves primer adhesion.
Repair Imperfections
After cleaning, inspect your trim for any damage. You need to repair imperfections before you paint.
For dents and smaller holes, consider specific products. You can use 3M small hole repair. Bondo glazing putty also works well for areas needing a tight bond.
Sometimes, thick coats of paint can smooth out minor imperfections. This happens naturally without additional filling.
For larger holes in wood trim, use the ‘Dutchman technique’. This method involves patching the hole with a custom-cut piece of wood.
Prepare your workspace. Lay a drop cloth. Ensure good lighting. Set up your tools.
Create a custom jig. Cut and assemble components from 1×2 and 1×4 lumber.
Cut the patch from 1/2-inch-thick poplar board. Make it slightly larger than the hole.
Route the recess in the trim. Use the custom jig and a trim router.
Squaring the corners of the recess. Use a wood chisel.
Install the custom-cut patch. Apply carpenter’s glue. Gently tap the patch into place.
Finish the repair. Sand the patch flush. Fill any gaps with carpenter’s glue. Then, prime and paint the area.
Fill any holes, dents, and cracks with a lightweight spackling compound.
Once the spackle is completely dry, lightly sand the spackled areas. Use 120-grit sandpaper to smooth the surface.
Sand for Adhesion
Sanding creates a surface that primer and paint can grip. This step is crucial for a smooth, durable finish.
Remove any sanding dust from the trim. Use a tack cloth.
For new or already smooth trim, lightly sand with 120-grit sandpaper. Continue until all shine is gone.
For rough or worn trim, start with 80-grit sandpaper. Then, move to 100- or 120-grit to smooth it.
A common wood shop practice is to start with 80 grit. Then, move to 120, and finish with 220.
Always sand with the grain. Use a low-angle light to identify defects.
Avoid skipping more than one grit in the progression. For example, do not go from P80 to P180 without P120/150. This can lead to uneven finishes.
For wood, a popular grit progression is 80 grit, followed by 120 grit, 150 grit, 180 grit, and 220 grit.
P220 is appropriate for wood stain preparation. It also works for commencing surface finishing.
Tape and Protect Surfaces
Protect areas you do not want to paint. Use painter’s tape and drop cloths. This ensures clean lines and prevents accidental drips.
Lay down the first color. Extend it past the area where the line will be. If you use two layers per color, paint both layers.
Once the paint is dry, place your masking tape. The bottom of the masking tape marks the edge between the two colors.
Using the same color, paint along the tape edge. This seals the edge. It allows the first color to bleed under the edge. This prevents the second color from bleeding. Make sure the lower edge of the paint feathers softly away.
When the bleed-under layer has dried, paint the second color. Ensure it overlaps the tape line.
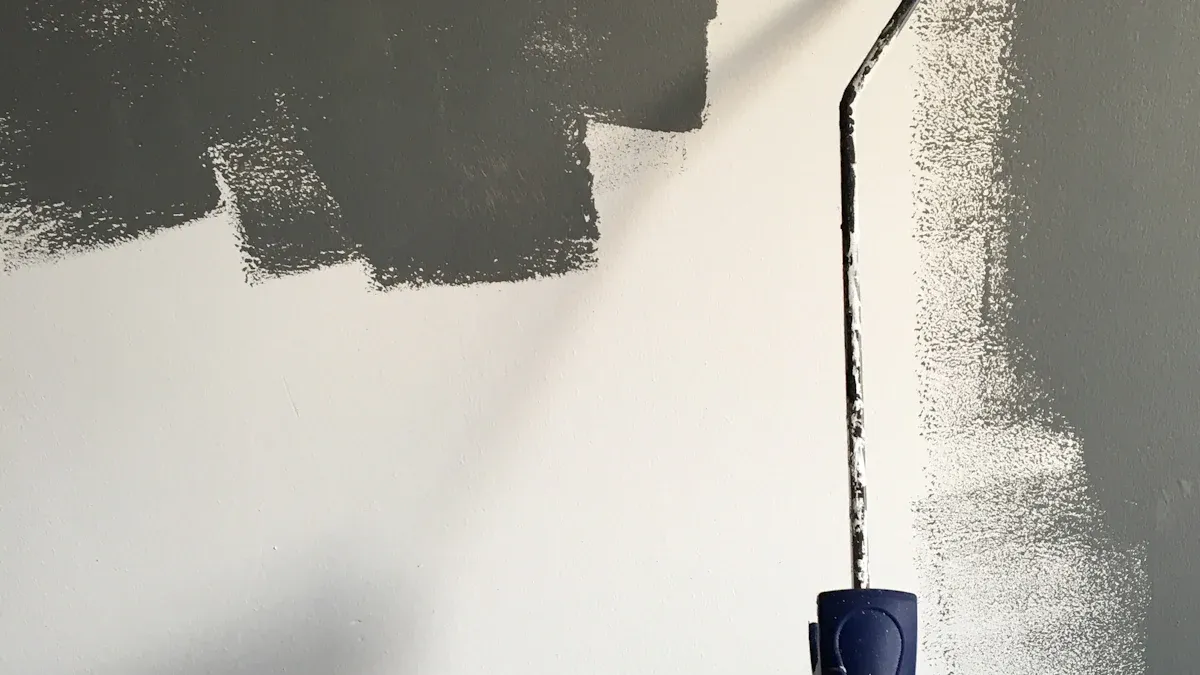
Apply Stain-Blocking Primer
A high-quality stain-blocking primer is essential. It prevents stains from bleeding through your white topcoat. This is especially important when you paint over stained wood.
Apply the primer evenly. You can use a roller for this step. The same method applies to both primer and paint.
Typically, one coat of a high-quality stain-blocking primer is sufficient. You might need a second coat if stains continue to bleed through.
Allow the primer to dry completely. This is crucial before you apply paint. Some primers, like Sherwin-Williams Quick Dry, dry in just one hour. Valspar® Stainblocking Bonding Primer/Sealer also dries to the touch in 30 minutes to 1 hour. It is ready for recoat in the same timeframe. However, always check the product label for specific drying times.
Caulk After Priming
Caulking after priming fills any remaining gaps. It creates a seamless look. This step is important for a professional finish.
Apply a thin bead of caulk along seams and joints.
Smooth the caulk with a wet finger or a caulking tool.
Allow the caulk to dry completely before painting.
Apply First Paint Coat
Now you are ready to apply the first coat of white paint. This is an exciting step in painting trim white.
Load the top one-third of a 2-inch angled brush with paint. Take it directly from the can.
Tap both sides of the brush against the paint can. Wipe the bristles along the sides. This removes excess paint.
Press lightly with the brush. Apply paint in a single stroke, in one direction. Do this on the widest part of the trim.
Work slowly. Ensure a smooth and even application.
To avoid brush marks, start subsequent strokes in a dry area. Work towards wet ones.
Feather the edge into a previously painted patch. This maintains evenness.
Lightly brush paint back over the applied coat in the reverse direction.
Apply Second Paint Coat
A second coat of paint provides better coverage and durability. This ensures your white trim looks its best.
Allow the first coat to dry completely. For water-based semi-gloss paint, the recoat time is typically 2 to 2 1/2 hours. Proper drying time ensures better adhesion. It also creates a smoother finish and stronger surface protection.
Apply the second coat using the same technique as the first.
Ensure you apply two coats of quality latex semi-gloss paint for the best results. This will give you a rich, even white color.
Remove Painter’s Tape
Removing painter’s tape correctly prevents paint peeling. This ensures crisp, clean lines.
Remove tape when the paint is almost dry. Do not wait until it is fully dry. This is typically about an hour after application.
For multiple coats, leave the tape on until the final coat is dry to the touch.
Pull the tape off slowly. Pull it at a 45-degree angle. Keep it low and close to the surface. This prevents jagged edges or peeling paint.
If resistance occurs, gently score along the edge of the tape. Use a utility knife or putty knife. This breaks the paint seal before you continue.
If tape has been left on too long and dried out, use a blow dryer. Warm up the tape. This softens the glue. It allows the tape to come off in one piece instead of shredding.
Pro Tips and Common Painting Mistakes
You want a professional, lasting finish when you paint wood trim white. Proper sanding, priming, and choosing the right paint are crucial. Here are the best tips and tricks to help you avoid common painting mistakes.
Choosing the Right Sheen
The right paint sheen makes a big difference. Semi-gloss paint is very durable and wipeable. It is the most common sheen for trim, baseboards, and doors. This is because you touch these surfaces often. Semi-gloss is also moisture-resistant. It makes spaces look brighter. Satin paint is also durable and stain-resistant. It hides minor flaws better than semi-gloss.
Effective Brushing Techniques
Use good brushing techniques for smooth, streak-free results. Dip your brush one-third into the paint. Tap both sides against the can rim to remove excess. Apply paint in long, smooth strokes. Follow the wood grain. Work quickly to keep a wet edge. Overlap slightly into painted areas before they dry. Use an angled brush with firm, synthetic bristles for trim. This gives you optimal control.
Preventing Bleed-Through
Prevent wood tannins or old colors from bleeding through your new white paint. Thorough preparation is key. This includes cleaning and sanding. Apply a priming product. Primers act as a barrier. For stubborn stains, use two light coats of dewaxed shellac. For full coverage, use BIN Shellac-Based White Tinted Primer.
Proper Drying Times
Respect drying times. Latex paint dries to the touch in 1-2 hours. You can recoat it after 4 hours. Oil-based paint takes 6-8 hours to dry to the touch. You need to wait 24 hours before recoating. Full cure times are longer. Latex takes 30 days. Oil-based takes 7-10 days.
Skipping Preparation Steps
Skipping preparation steps causes many problems. The paint will not stick well. This leads to peeling, cracking, and bubbling. You will get a patchy finish. Moisture can cause mold and mildew. New paint needs a clean, dust-free surface to adhere effectively.
Using Wrong Primer or Paint
Using the wrong primer or paint leads to poor results. An incompatible primer or paint can cause premature failure. You might see cracking, flaking, or peeling. Staining, fading, and discoloration can also happen. For trim, use a bonding primer. Then apply a semi-gloss or gloss enamel. These products provide a smooth, cleanable, and hard-drying finish.
Applying Too Much Paint
Applying too much paint creates issues. You will see drips and sags. This makes the surface uneven. Excessive buildup can occur. Too much paint can even seal windows and doors shut.
Rushing the Process
Rushing the painting process leads to mistakes. You might get uneven coverage or missed spots. Sloppy edges can happen. This compromises the final quality. A rushed paint job will not last as long. It might peel or fade in just a few years. Take your time. Allow adequate drying time between coats.
You now see the significant impact of freshly painted white trim. It truly transforms your home’s aesthetic and atmosphere. This guide provided you with key takeaways for preparation, material selection, and proper application techniques for painting trim white. You can confidently embark on this rewarding DIY project. Following these steps ensures a beautiful, long-lasting, and professional-looking update. Your home will feel brighter and cleaner with its new white trim. This fresh white look enhances every room. You will love the crisp, white lines. The overall white finish is stunning. This white project brings lasting value.
FAQ
What type of paint should you use for trim?
You should use a high-quality latex semi-gloss or satin enamel paint. These paints offer durability and are easy to clean. Enamel paints dry hard and smooth, providing a professional finish. They resist scuffs and moisture well.
What is the best way to clean trim before painting?
You should clean your trim with a non-soapy degreaser like TSP No-Rinse Substitute. This removes dirt, grease, and grime effectively. For stubborn spots, use a liquid deglosser. This prepares the surface for better paint adhesion.
What kind of primer works best for wood trim?
You should use a high-quality stain-blocking primer. An oil-based primer is often best for wood trim. It prevents wood tannins and old stains from bleeding through your new white paint. This ensures a bright, even finish.
What causes paint to peel off trim?
Paint peels off trim due to poor preparation. You might skip cleaning, sanding, or priming steps. Using the wrong type of primer or paint also causes peeling. Always ensure proper surface prep and use compatible products for lasting results.

