
You dream of a beautiful, updated bathroom, right? Many people do, but the thought of a huge price tag stops them. An average professional bathroom remodel can easily cost over $27,000, which is a lot! Good news: a stunning bathroom makeover is totally within reach. You can achieve a significant transformation through smart, budget-friendly DIY strategies.
Even small changes create a big impact, with some projects costing as little as $250 or under $1,000. This blog guides you through practical, affordable ways to transform your bathroom without breaking the bank. Get ready to create your dream bathroom on a budget with your own DIY skills!
Plan Your Budget DIY Bathroom Remodel
Before you grab your tools, take time to plan your DIY bathroom remodel. Good planning saves you money and stress. It helps you make smart choices from the start.
Assess Needs Versus Wants
First, think about what your bathroom truly needs. What problems do you want to fix? Maybe you need more storage or a brighter space. Then, consider your wants. Do you dream of a spa-like shower or a fancy new vanity? Make two lists: one for “needs” and one for “wants.” Focus on your needs first. This helps you prioritize your spending. You can add some wants later if your budget allows.
Set a Realistic Budget
Now, let’s talk money. How much can you realistically spend on this bathroom renovation? For a general DIY bathroom remodel, you can expect to pay between $3,000 and $8,000. This range changes based on your location and the specific updates you make. A light DIY refresh, like painting or swapping hardware, typically costs between $500 and $3,000. If you plan a more involved DIY remodel, perhaps installing new tile or updating the toilet, expect to spend $3,000 to $10,000. This depends on your chosen materials and tools. Knowing your budget helps you choose projects that fit.
Research Affordable Design Ideas
Look for design ideas that match your budget. Browse online for inspiration. Pinterest and home improvement blogs offer many clever solutions. You can find ways to get a high-end look without the high price. Focus on simple, clean designs. These often look great and cost less. Collect pictures of bathrooms you love. Then, find ways to adapt those ideas to your own bathroom and budget.
High-Impact, Low-Cost Bathroom Updates
You want to see big changes without spending a lot of money, right? This section gives you specific, easy updates. These updates offer huge visual improvements for a small cost. You can transform your bathroom with smart choices.
Paint Power for Walls and Cabinets
Paint is your secret weapon for a budget-friendly bathroom remodel. A fresh coat of paint can completely change the feel of your bathroom. It’s one of the most impactful DIY projects you can do. When you choose paint for your bathroom walls, consider these durable and cost-effective options:
Paint Type | Moisture Resistance | Drying Time | Durability | Other Characteristics |
|---|---|---|---|---|
Acrylic Paint | Excellent (water-based, high-moisture formulas available) | Quick | Durable, resists fading/yellowing, withstands frequent cleaning | Adheres well, often contains mold/mildew additives |
Latex Paint | Good (water-based, high-humidity formulas available) | Quick | Excellent coverage, less likely to yellow than oil-based | Easy to apply, minimal odor, often contains mildewcides |
Oil-Based Paint | Excellent | Longer | Hard, durable finish, withstands frequent cleaning | Stronger odors, potential yellowing, requires special solvents/disposal |
You can also paint your cabinets! Painting your cabinets gives them a brand-new look. It saves you the cost of buying new ones. Many popular color palettes work well for bathroom cabinet painting in DIY remodels:
Black, White, and Wood Tones: Combine a classic black and white scheme with natural wood elements. You can paint your cabinets to mimic wood tones or choose a crisp white or bold black.
Blue, White, and Black Combination: Imagine vibrant blue walls with white accents. Then, paint your cabinet in a tone close to black. This creates a striking contrast.
A fresh coat of paint your space makes a huge difference.
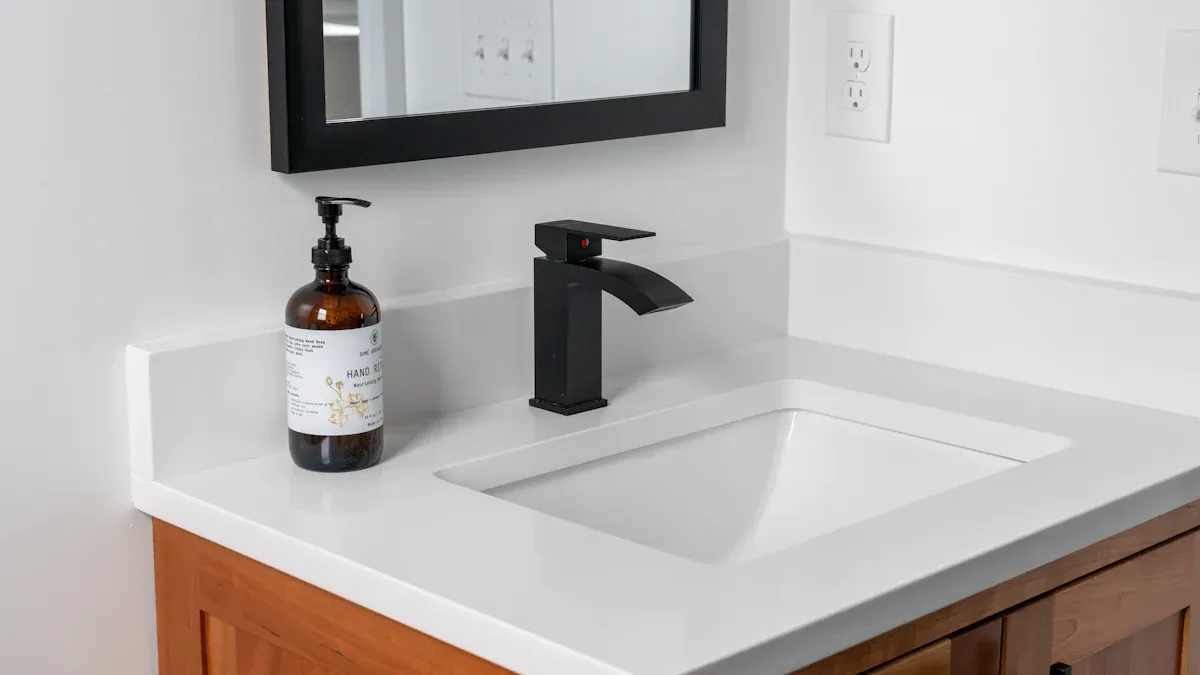
Fixture Facelift: Hardware & Faucets
Small details make a big impact. Updating your bathroom’s hardware and faucets is a simple way to refresh the space. You can swap out old drawer pulls, cabinet knobs, and towel bars. You can also replace your faucet. These changes instantly modernize your bathroom.
Current trends offer many affordable options for hardware finishes:
Matte Black Finishes: This is a popular choice for modern bathrooms. It looks sophisticated and hides fingerprints and water spots well. Matte black offers a bold contrast.
Mixed Metal Finishes: Don’t be afraid to mix and match! You can combine two or more metal finishes. Think brushed brass with matte black, or polished nickel with oil-rubbed bronze. This creates visual interest and a personalized design.
Brushed Nickel: This finish offers a warm, soft, matte look. It hides fingerprints and water spots, making it practical for busy bathrooms. It works well with contemporary or transitional styles.
Luxe Gold and Brass Tones: These tones are back! They add a touch of luxury and warmth. They fit classical or opulent designs.
These small updates can make your bathroom feel brand new without a high cost.
Lighting Upgrades for Your Bathroom
Good lighting is essential in any bathroom. It makes your space feel brighter and more inviting. Upgrading your lighting fixtures can dramatically improve the look and function of your bathroom. You can replace an outdated vanity light or add new overhead lighting.
For vanity lighting, you need enough brightness for tasks like grooming. Bathroom vanity lighting should generally be between 1,500 and 4,000 lumens. This depends on your bathroom’s size and how much natural light it gets. For small bathrooms, 1,500 to 2,500 lumens are usually enough. Medium-sized bathrooms benefit from 2,500 to 3,500 lumens for optimal lighting. Large bathrooms often need 3,500 to 4,000 lumens or more. The American Lighting Association recommends a minimum of 1600 lumens for vanity lighting. Consider LED bulbs for energy efficiency and long life.
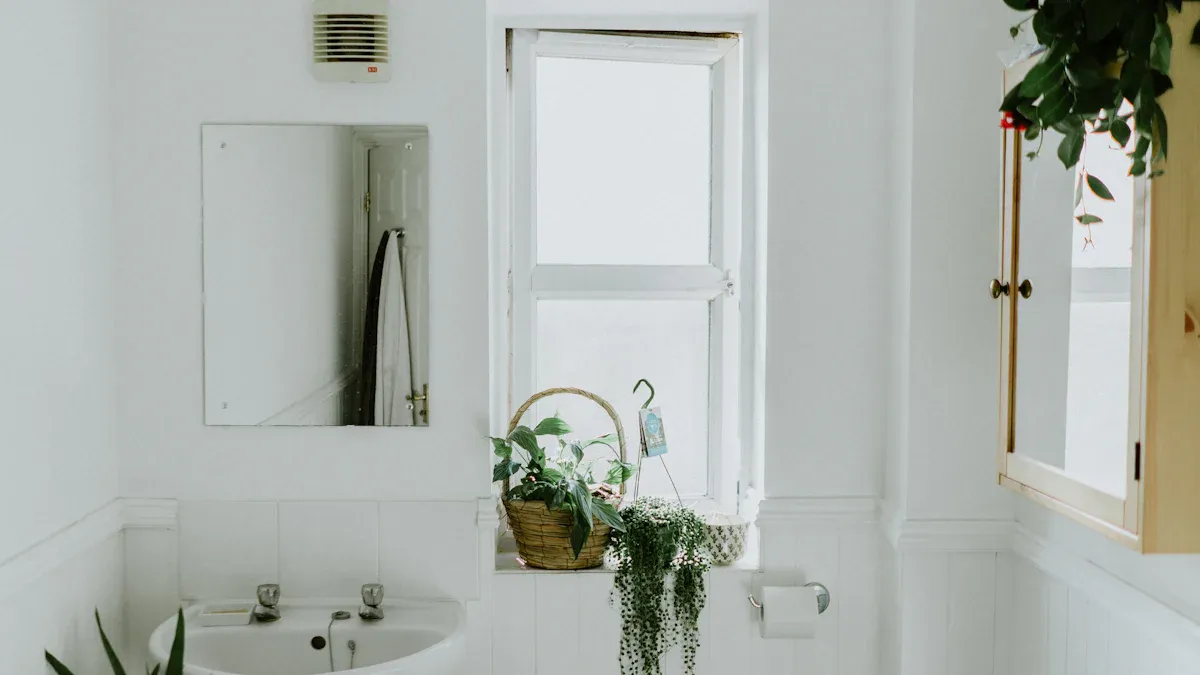
Mirror Magic for Visual Impact
A mirror is more than just a functional item in your bathroom. It can be a design statement. A new mirror can make your bathroom feel larger and brighter. It reflects light and creates an illusion of more space.
Many mirror sizes and shapes enhance small bathroom spaces:
Round mirrors: These add a soft, elegant touch. They can be a focal point and make the space seem bigger.
Tall, narrow mirrors: These draw your eye upward. They create the illusion of height, especially in bathrooms with low ceilings.
Frameless mirrors: These sit flat against the wall. They save space and keep the room feeling open. They also offer a cleaner, more refined appearance. They integrate well with many styles. Frameless mirrors are also easier to clean. There are no frames to harbor germs or mold. They are often more cost-effective too.
Mirrored cabinets: These combine storage with reflective benefits. They keep clutter hidden and make the space appear larger.
Choosing the right mirror can truly transform your bathroom.
Smart Surface Solutions for Your Bathroom
You want your bathroom surfaces to look great without spending a fortune, right? This section focuses on clever, budget-friendly alternatives for countertops, tiles, and flooring. You can achieve a high-end look with smart DIY choices. Neutral and timeless finishes for hard surfaces often give you the best long-term value and appeal.
Countertop Resurfacing Techniques
Replacing a countertop can be expensive. Instead, consider resurfacing your existing one! This DIY method saves you significant cost and gives your bathroom a fresh look. You can find various DIY kits designed for this purpose.
For example, countertop epoxy kits offer beautiful natural stone patterns. These kits often include:
2 gallons of Premium FX Poxy
1 Liquid Pigment
3 FX Metallic Accent Powders
These kits are heat resistant and food safe. You apply them directly over your existing countertops for a durable finish. You can find options like:
Create Your Own Countertop Bar Top Epoxy Kit: $279.46
Premium White Marble FX Poxy Countertop Kit: $290.95
Premium Copper Patina FX Poxy Countertop Kit: $279.46
Premium Concrete Grey FX Poxy Countertop Kit: $279.95
Premium Soapstone FX Poxy Countertop Kit: $311.71
Premium Turquoise Nebula FX Poxy Countertop Kit: $279.46
Premium Bronze FX Poxy Countertop Kit: $311.96
Premium Black Marble FX Poxy Countertop Kit: $279.21
While epoxy can look fantastic, you should know about its durability. Some epoxy counters might end up too soft. This leads to easy scratching or denting. Other epoxy counters might become too brittle, resulting in cracks over time. Repairing epoxy countertops is also challenging. You often need an entirely new coat to fix scratches, dents, or cracks. Always follow the kit instructions carefully for the best results.
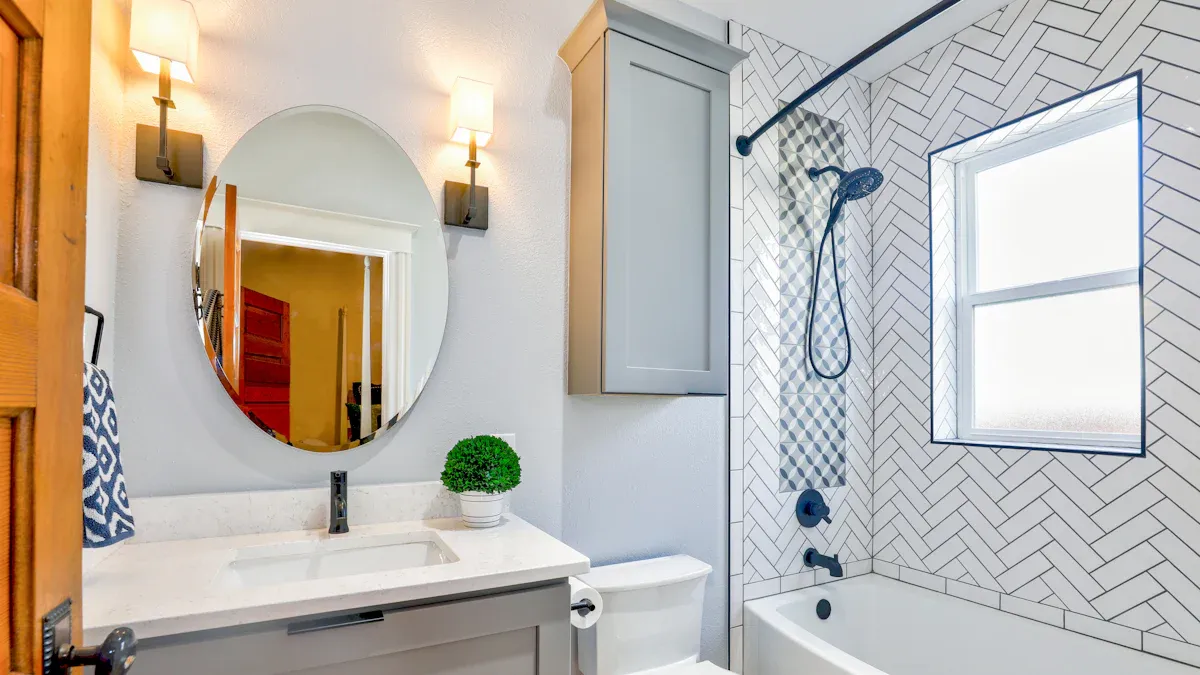
Tile Transformations: Paint or Peel-and-Stick
Do you have outdated or discolored tiles? You do not need to rip them out! You can transform them with paint or peel-and-stick options.
You can paint your existing tiles. Special tile paint is durable and moisture-resistant. It can completely change the look of your shower surround or floor. Make sure you clean and prep the tiles properly. This ensures the paint adheres well and lasts a long time. A fresh coat of paint can make your bathroom feel brand new.
Another fantastic option is peel-and-stick tiles. These are easy to install and come in many styles. They are perfect for a quick update on walls or even floors in low-traffic areas. For the best peel-and-stick tiles for bathroom walls, Stickwoll is a top choice. It performed exceptionally well in ‘Humidity Chamber Tests,’ showing no signs of peeling or water damage. Its adhesive also proved powerful in ‘Weighted Peel Tests,’ ensuring long-term application. While not the cheapest, Stickwoll offers outstanding value. It provides superior performance and a wide design range, including modern subway tiles and intricate mosaics. Consider using paint or peel-and-stick tiles for a dramatic change without the mess and cost of traditional tiling.
Affordable Flooring Fixes (e.g., LVT)
Your bathroom floor takes a lot of wear and tear. You want something durable, water-resistant, and stylish. Luxury Vinyl Tile (LVT) is an excellent, affordable choice. It offers many advantages over traditional bathroom flooring materials.
LVT provides a wide array of design choices. It can replicate natural materials like wood, stone, or ceramic tile. This gives you diverse aesthetic options. You get a high-end look at a significantly lower cost compared to natural wood or stone.
LVT is also incredibly practical:
Easy Maintenance: Unlike natural stone or hardwood, LVT requires only simple sweeping or mopping for cleaning. You do not need special sealants or cleaners.
Durability and Resilience: LVT resists scratches and stains. This makes it a robust choice for your bathroom.
Water and Moisture Resistance: Unlike hardwood and laminate, LVT does not swell, twist, or warp when exposed to water. This is crucial for a bathroom environment.
Insulation: LVT offers built-in insulation. This provides more comfort and warmth underfoot compared to stone, cement, or tile.
LVT has a lower upfront cost than many other flooring types. It is a budget-friendly option with a long lifespan. You can install it yourself, saving even more on labor costs.
Budget Storage & Organization for Your Bathroom
You want your bathroom to feel more spacious and work better, right? This section gives you creative and inexpensive ways to improve storage and organization. You can make your bathroom feel much more functional.
DIY Open Shelving Solutions
Open shelving is a fantastic way to add storage without making a small space feel cramped. You can build these shelves yourself. This is a great diy project that saves money. For wood, choose types that handle moisture well. Walnut, maple, and oak are popular choices for your bathroom shelving. Remember to put a water-resistant sealant on the wood. This protects it from humidity and makes it last longer. These simple ideas add both function and style to your bathroom.
Smart Storage: Baskets & Caddies
Baskets and caddies are your friends for smart storage. They help you keep things tidy. You can use them under the sink or on your new open shelves. They hide clutter and make your bathroom look neat. Plus, you can find many stylish options that fit your budget. These simple additions make a big difference, especially in a small space.
Decluttering for a Fresher Feel
Before you organize, you need to declutter. This is the most important step. It helps you see what you really have. Start by sorting items into “Keep,” “Donate,” “Trash,” and “Belongs Elsewhere.” Then, look at your “Keep” pile. Ask yourself:
“Do I use this?” Focus on what you use now, not what you might use later.
“Is this product still good?” Check expiry dates for makeup and medicine.
“Is this item extra?” Do you need three bottles of the same shampoo?
“Would I buy this today?” If not, maybe it’s time to let it go.
You can also do a daily tidy-up. Hang towels on hooks. Put toothbrushes back in holders. This stops clutter from building up. Every few months, take inventory. Get rid of old makeup, expired meds, and half-used toiletries. Avoid buying too many hair and beauty products. Only buy what you truly need. Maximize vertical storage. Use towel hooks instead of racks. Stackable bins work well under the sink. These decluttering ideas make your bathroom feel fresh and spacious.
Essential DIY Remodel Tips for Success
You are ready to tackle your DIY bathroom remodel. Here are some crucial tips for success. These will help you avoid costly mistakes and ensure a smooth project.
Safety First in Your DIY Projects
Safety is always your top priority. When you work on your bathroom, you face different hazards. For demolition tasks, wear safety goggles to protect your eyes from flying debris. Use work gloves for sharp materials and rubber gloves when dealing with water lines. A dust mask is also important to avoid inhaling particles, especially when removing wall tile.
If your DIY project involves electrical work, you must be extra careful. Always turn off power at the breaker before you start any electrical work. Double-check with a voltage tester to make sure the power is off. Use insulated tools designed for electrical work. Wear protective gear like safety goggles and gloves. Keep a fire extinguisher nearby. All bathroom outlets must have ground fault circuit interrupters (GFCIs). These prevent shock by shutting down power if there is an issue. Ensure electrical sockets are far from showers or tubs. Relocate outlets if they are too close to water.
Patience is Key for Quality Results
Rushing your DIY bathroom remodel can lead to big problems. Many DIYers make mistakes when they hurry. You might skip important steps like proper caulking or sealing. This can lead to leaks or mold. Improper DIY plumbing can cause water damage. Using the wrong materials for floors and walls can also lead to issues like warping or peeling. Take your time. Follow instructions carefully. This ensures a quality result.
When to Call a Pro for Your Bathroom
Sometimes, you need to know when to call a professional. While a diy bathroom remodel saves money, some jobs are best left to experts. If you hear gurgling sounds from drains or see wet spots on walls, you might have a serious plumbing issue. Slow drains or foul smells can also signal bigger problems. These need a professional plumber.
You also need a contractor for major structural changes. If you plan to change the bathroom’s size, move walls, or install new windows, call a pro. These changes often involve load-bearing elements. A “gut remodel,” where you take walls down to the studs, also needs a contractor. They handle re-framing and ensure everything meets code. Knowing when to get help prevents expensive mistakes.
You now know a stunning, budget-friendly bathroom remodel is entirely achievable with the right DIY approach. You learned about smart planning, high-impact updates, clever surface solutions, efficient storage, and essential DIY tips. Confidently embark on your own DIY bathroom remodel. You will feel great creating a beautiful space on a budget. Enjoy your refreshed and personalized bathroom makeover. This renovation will bring you joy every day.
FAQ
What is the most budget-friendly way to update my bathroom?
Painting your walls and cabinets offers the biggest impact for the least money. You can also swap out old hardware, like cabinet pulls and faucets. Don’t forget a new mirror! These small changes make a huge difference in how your bathroom looks and feels. ✨
What DIY bathroom projects can I finish in a weekend?
You can easily paint your bathroom walls or cabinets. Swapping out light fixtures or installing new hardware is also quick. Consider adding peel-and-stick tiles for a fast backsplash update. These projects give you instant gratification!
What are the best affordable flooring options for a DIY bathroom remodel?
Luxury Vinyl Tile (LVT) is a fantastic choice. It looks great, resists water, and is very durable. You can install it yourself, saving on labor costs. LVT comes in many styles, mimicking wood or stone, so you get a high-end look without the price.
What should I avoid when doing a DIY bathroom remodel?
Don’t rush your work, especially with plumbing or electrical tasks. Always prioritize safety first! If a job feels too big or complex, like moving walls or major plumbing, call a professional. This prevents costly mistakes and ensures everything is up to code. 👷♀️

