
You just pulled up old carpeting, and now you’re faced with the frustrating task to remove carpet glue. Wood and concrete floors each demand unique approaches for removing carpet glue. This guide shows you how to effectively and safely remove this adhesive from both surfaces, preparing your floors for new flooring or restoration. Proper preparation, tools, and techniques are crucial to remove carpet glue, helping you avoid damage and achieve a clean finish.
Understanding Carpet Glue Challenges
Before you begin the physical work, you need to understand the challenges of carpet glue. This knowledge helps you choose the right approach.
Types of Carpet Glue
You will encounter different types of carpet glue. Each type has a unique chemical makeup. These glues often contain polymers, which are compounds like natural rubber or neoprene. Binders hold the adhesive together; examples include rubber-resin or latex-resin. Resins improve adhesion and strength. You might find vinyl, acrylic, or gum rosin in these. Fillers, such as clay or silica, lower costs and improve viscosity. Plasticizers soften the glue and add flexibility. Additives like thickeners or preservatives are also present.
Water-based carpet glues are common. Their composition makes them react to moisture and heat. You can easily remove water-based glues. Hot water and soap, steam, or a vinegar solution effectively loosen them. Citrus-based removers also work well. This shows how the glue’s type dictates its removal method.
Why Glue Removal is Essential
You must remove carpet glue for several important reasons. First, it improves the look of your floors. Old, sticky glue is unsightly. Second, you need a clean surface for new flooring. New floors will not lay flat or adhere properly if old glue remains. For example, a floating floor can interfere with movement if the glue is sticky. Older adhesives, especially from the 1950s, might contain asbestos. If you have 9″ x 9″ tiles, you should test for asbestos. This may require professional abatement. Finally, removing glue ensures a level surface. This prevents squeaks and helps your new floor sit perfectly.
Common Removal Obstacles
You will face several obstacles during carpet glue removal. Old glue often becomes very stubborn. It hardens over time, making it difficult to scrape off. You also risk damaging your floor. Aggressive scraping can scratch wood or concrete. Some DIY hacks you find online might not work as expected. Their success varies depending on the glue type and age. These challenges make careful planning and the right tools crucial for effective removal.
Essential Tools for Removing Carpet Glue
You need the right tools to effectively remove carpet glue. These tools help you work safely and efficiently.
Safety Gear Requirements
Your safety comes first. You must protect yourself from chemicals and dust. Wear a mask. This avoids solvent inhalation. You also need gloves and goggles. These prevent skin contact and eye irritation. For stronger chemicals, consider chemical protective clothing or even full chemical protective suits.
Mechanical Scraping Tools
You will use several tools for scraping. A floor scraper helps remove large sections of glue. For example, a QEP 8″ Extend Floor And Wall Scraper works well. Putty knives are useful for smaller areas and edges. You can also use a heat gun or a blow dryer. These tools soften old adhesive. This makes scraping much easier.
Chemical Cleaning Agents
Chemicals help dissolve stubborn glue. Mineral spirits can break down many adhesives. Acetone is another strong solvent. You can also find commercial carpet adhesive remover products. These are specifically designed for glue removal. Hot water or a wallpaper steamer can also soften water-based glues.
General Cleaning Supplies
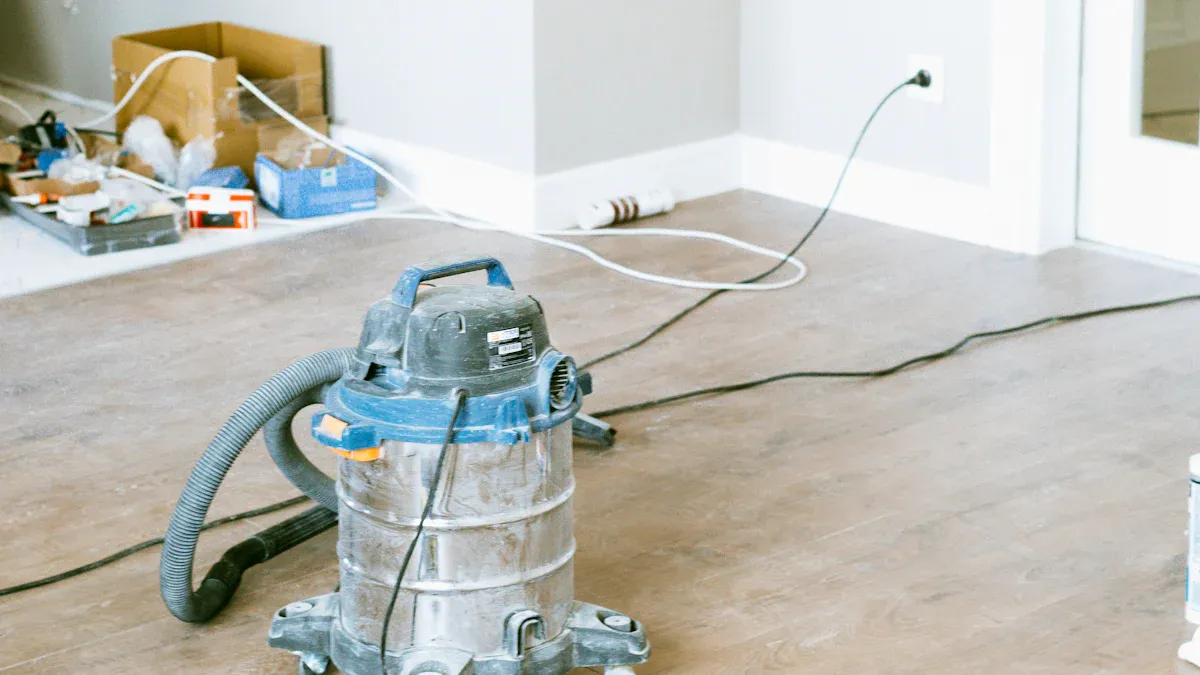
After scraping and treating, you need to clean up. Keep rags handy for wiping away residue. Buckets hold water or cleaning solutions. Mops help you clean the floor thoroughly. These supplies ensure a clean finish after removing carpet glue.
Removing Carpet Glue from Wood Floors
Removing carpet glue from wood floors requires a careful approach. You must protect the wood while effectively eliminating the adhesive.
Wood Floor Preparation
Proper preparation sets the stage for successful glue removal. You begin by clearing the room.
Clear the room of all furniture and obstacles. This ensures you have full access to the floor surface.
Cover surrounding areas. Use protective materials like drop cloths or plastic sheeting for furniture, baseboards, and walls. Secure these materials to prevent movement.
Ensure proper ventilation. Open windows and doors. Use fans to circulate fresh air. This reduces harmful fumes and odors. Wearing a respirator or mask is also recommended.
Testing Chemical Removers
Before you apply any chemical remover to your entire floor, you must test it. This prevents adverse reactions. Find an inconspicuous area, like a closet corner, to perform these tests.
Wax: Apply a drop of mineral spirits to a hidden spot. Let it sit for a minute. Then, test the area. If it feels tacky or lifts the finish, you have wax. Ensure the surface is clean first. This avoids confusion with grease or grime.
Shellac: If it is not wax, apply a small drop of denatured alcohol to an inconspicuous area. Wait about 10 seconds. Wipe the spot. If the finish dissolves, it is shellac. If it is just tacky, it might be a shellac mix.
Lacquer: If it is not shellac, apply a small drop of lacquer thinner or acetone to a hidden spot. If it is lacquer, the finish will dissolve almost immediately. Wait about 10 seconds. Wipe the spot. If it leaves a clean spot, it is lacquer. If it softens but does not remove the finish, proceed to the next test. (Perform this after the shellac test. These chemicals also remove shellac.)
Water vs. Oil-based (Varnish/Poly): If the above tests show no results, apply a small amount of xylene. Wait a few seconds. Check the area. If it is water-based, the xylene will dissolve it. If there is no response, it is likely an oil-based poly or paint.
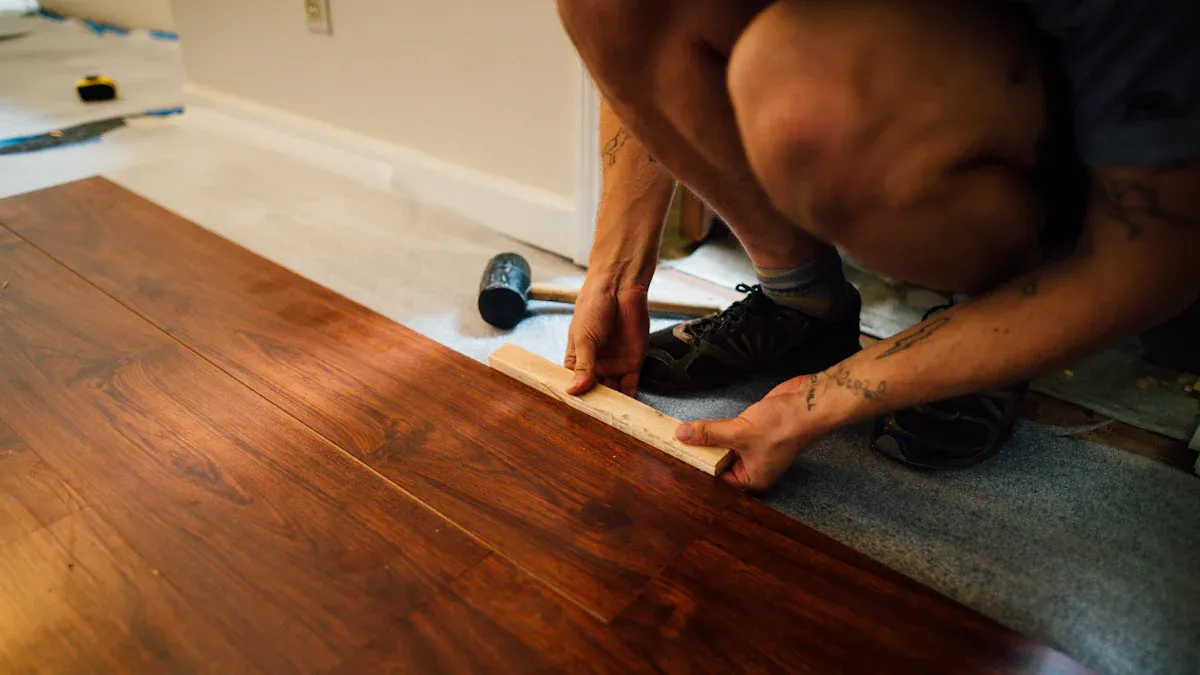
Mechanical Removal Techniques
You can use mechanical methods to remove carpet glue. A putty knife helps scrape off softened adhesive. For stubborn spots, use a heat gun or a blow dryer. Direct the heat onto the old adhesive. This softens it. Softened glue is much easier to scrape away. Work slowly and carefully. Avoid digging into the wood.
Chemical Application and Cleanup
After mechanical removal, you might still have residue. Apply mineral spirits or acetone to these areas. You can also use wood-safe commercial carpet adhesive remover products. Follow the product instructions carefully. Apply the chemical to a small section. Let it sit for the recommended time. Then, wipe away the residue with a clean rag. Repeat this process until the glue is gone.
Post-Removal Finishing
After removing carpet adhesive, you need to clean and finish your wood floor. This prepares it for its new look.
Allow the floor to dry: After removing carpet adhesive, let the floor dry completely. Opening windows speeds up drying. It also airs out lingering chemical smells.
Clean the floor: Once dry, sweep and vacuum the floor. This removes all debris.
Sand the floor: Even if the floor looks good, sanding is usually necessary. It removes scuff marks from glue removal or carpet installation. Sanding prepares the floor for finishing.
Prepare the room: Remove all furniture. Cover items and doorways with plastic. This protects them from dust. Hammer down any protruding nails.
Choose a sander: For beginners, an orbital sander is recommended. It is easier to control than a drum sander.
Sand the wood: Attach coarse grit sandpaper (e.g., 36) to the sander. Sand along the wood grain. Work methodically across the room.
Vacuum after sanding: Remove all dust and debris.
Repeat with finer grits: If needed, sand again with finer grits (e.g., 60, 80, 100). This achieves a smooth finish. Vacuum again.
Fill holes and gaps: Use wood filler for any gaps or holes. Lightly sand the repaired areas. This blends them with the rest of the floor. Vacuum once more.
Apply stain or finish: Use a paintbrush. Apply your chosen stain or finish along the wood grain. Allow it to dry.
Removing Carpet Glue from Concrete Floors
Removing carpet glue from concrete floors requires a robust approach. Concrete is durable, but you still need to protect it.
Concrete Floor Preparation
You must prepare your concrete floor properly. This ensures effective glue removal. First, clear the area. Remove all furniture and obstacles. Protect adjacent walls with plastic sheeting or drop cloths. This prevents damage or splashes.
Before you start, evaluate your project. Consider the final flooring system you plan to install. Think about access to the area. Also, consider environmental concerns like noise, dust, and ventilation. You must understand the concrete substrate itself.
If you find 9″x9″ tiles or black adhesive from the 1960s or 1970s, get it tested for asbestos. If the test is positive, contact an abatement company. Asbestos removal requires professionals.
For most contaminants, mechanical methods work best. These include scarifying or shot blasting. The removal must go deep enough to eliminate all penetrated contaminants. Avoid acid washing. It is hard to control. It also leaves residue. Acid can penetrate porous concrete. This affects its long-term integrity. Acid washing is also ineffective for grease and oil. Sanding equipment does not effectively remove curing and sealing compounds.
Do not use solvents. Solvents can drive oil, grease, and other contaminants deeper into the concrete. These contaminants can resurface later. Physical removal of oil-contaminated concrete is the only reliable way to ensure a clean surface. Sweeping compounds can leave an oily film. This creates a bond-breaking layer. This can cause flooring failure. Always sweep and vacuum the surface with a clean, dry broom. Do this before applying any underlayment. Never use adhesive removers or solvents on porous concrete. They can carry contaminants into the pores. This leads to migration back to the surface. This causes floor covering bond failure.
Wear safety gear. Goggles protect your eyes from flying debris. Use gloves to protect your hands from sharp blades. Wear work boots, long pants, and a long-sleeve shirt for body protection. Use a mask to avoid inhaling dust and contaminants. If your flooring was installed in 1981 or earlier, it might contain asbestos. Contact a professional for testing before removal.
Testing on Concrete
Always test any remover on a small, hidden concrete area first. This prevents discoloration and confirms effectiveness. Patch testing is crucial. It prevents surface damage.
Apply a dime-sized amount of the remover to an inconspicuous spot. Wait 15 minutes for standard removers. For citrus-based solvents, wait 20-30 minutes. This allows the product to penetrate. Check the treated area for discoloration or changes in texture. If the concrete remains unaffected, you can proceed with the full application.
Aggressive Mechanical Removal
Concrete floors can handle more aggressive mechanical removal. You can use a sharp razor-edge scraper. This requires significant effort. For larger areas, consider a concrete grinder. It uses abrasive tooling to remove remaining adhesive. Scrapers alone may not remove all adhesive. Power washing can also help. A carbide spinner head or shot blasting are other options. These methods are very effective for removing carpet adhesive.
A wallpaper steamer can soften some glues. This makes them easier to scrape. You can also pour boiling water on stubborn glue spots. Take precautions to avoid spills. For large glue spots, use a floor scraper or razor. A reciprocating saw with a scraper attachment can help with large areas.
Chemical Treatment for Concrete
You can use commercial concrete glue removers. Hot water also works for some glues. Some glues on concrete may advise against solvents or chemicals. Remember, never use adhesive removers or solvents on porous concrete. They can cause bond failure. Mineral spirits can help with minimal carpet adhesive residue. Apply an eco-friendly, low-odor, low-VOC glue and mastic remover. Follow the product instructions for application and waiting times. Then, scrape the glue away.
Cleaning Carpet Adhesive Residue
After removing carpet adhesive, you must clean the floor. This prepares it for new flooring. First, thoroughly wash the concrete surface. Use a mild soap and water solution for this cleaning. Remove any remaining loose pieces of adhesive with an absorbent cloth. Rinse the floor well. Ensure you remove all chemical residue. Let the floor dry completely. If you used strong chemicals, you might need to neutralize the floor. Follow the chemical product’s instructions for neutralization.
Tips for Stubborn Glue and Prevention
You will encounter challenges when removing carpet glue. These tips help you handle stubborn spots and work safely.
Tackling Thick Glue Layers
Thick glue layers can be very difficult. Some methods work better than others. Murphy’s Soap does not help at all. Citristrip and mineral spirits remove adhesive, but they work very slowly. Boiling water poured directly on glue is not effective. However, boiling water applied to a towel and left to soak for an hour works much better. It even outperforms chemical strippers and uses no harmful chemicals. Steam from an iron or steam mop also works well, but it is slow for large areas. Sentinel 747 gives amazing results. It works much faster than steam.
To use Sentinel 747:
Cut the carpet into strips with a utility knife. Peel each strip up.
Scrape up the foam backing using a hand scraper.
Pour Sentinel 747 on a small area. Spread it with an old mop.
Let it soak for 15-20 minutes.
Scrub lightly with a wire brush. Use a scraper to remove all adhesive.
Repeat this process for stubborn areas until all adhesive is gone.
Importance of Ventilation
Good ventilation is crucial when you work with chemical glue removers. Products containing methylene chloride, for example, are best used outdoors. If you must work indoors, ensure the area is very well-ventilated. Methylene chloride can cause cancer in animals. It can also turn into carbon monoxide in your body. This leads to serious health issues. ASHRAE-62 provides general guidelines for indoor air quality. Always prioritize fresh air flow.
Safe Residue Disposal
You must dispose of carpet adhesive residue safely. Chemical-soaked rags and scraped glue pieces are hazardous waste. Do not throw them in regular trash. Check your local waste management guidelines. They tell you how to dispose of these materials properly. This protects the environment and your community.
Gentle Scraping Practices
Scraping gently prevents floor damage. Use plastic-only tools to avoid scratches. Always test products first to find incompatible ones. Keep heat moving constantly to prevent thermal damage. Work in small, manageable sections. This helps you control the quality. Only increase treatment intensity if gentler options fail. Apply minimal moisture and remove it quickly to prevent water damage. Avoid chemical pooling or long contact times. This preserves the floor’s finish. Use light-colored fabrics. They help you see progress and spot problems. Stop immediately if you see any damage. This limits the affected area.
When you use plastic scrapers and putty knives, position the tool at a 45-degree angle. Apply steady forward pressure. This creates leverage without too much force. Divide your workspace into 12-inch squares. Follow the wood grain patterns. This minimizes visible marks. Avoid scraping across the grain. That can create noticeable scratches. To soften adhesive first, use a hairdryer on medium heat. Keep it six inches away. Move it in a continuous circular motion for 30-60 seconds. This makes the glue pliable. For stubborn spots, use short heating intervals. This prevents thermal stress to wood fibers. Slightly cooled adhesive scrapes more cleanly than molten material. Clean your blade edge often. Use fresh scraper edges for efficiency.
When to Call a Professional
Most projects for removing carpet adhesive benefit from professional help. Small residential areas might be manageable for experienced DIYers. However, professional expertise saves you time and money. Experienced contractors quickly identify the best removal strategy. Modern adhesive formulas are complex. Surface preparation is critical. These factors make professional expertise very valuable.
You now understand that to remove carpet glue, while challenging, is entirely achievable with the right methods and patience. Remember these key takeaways:
Wood and concrete floors demand different approaches.
Your safety is always paramount during this process.
Follow the detailed steps provided in this guide. You will successfully prepare your floors. Enjoy the satisfaction of a clean, transformed surface, ready for its next chapter!
FAQ
What is the main difference in removing water-based versus solvent-based carpet glue?
You remove water-based glues with heat and moisture. Solvent-based glues require chemical removers. Identifying your glue type helps you choose the correct method. This ensures effective removal.
What should you do if you suspect asbestos in old carpet adhesive?
You must stop work immediately. Contact a professional abatement company. They will safely test and remove the material. Do not attempt to remove it yourself. Your safety is most important.
What happens if you do not remove all old carpet glue before installing new flooring?
New flooring will not lay flat or adhere correctly. This creates an uneven surface. Old glue can also prevent new adhesives from bonding. You need a clean, smooth base for success.
What safety precautions are essential when using chemical glue removers?
You must wear gloves, goggles, and a respirator. Ensure the area has excellent ventilation. Open windows and use fans. These steps protect you from fumes and skin contact.

