
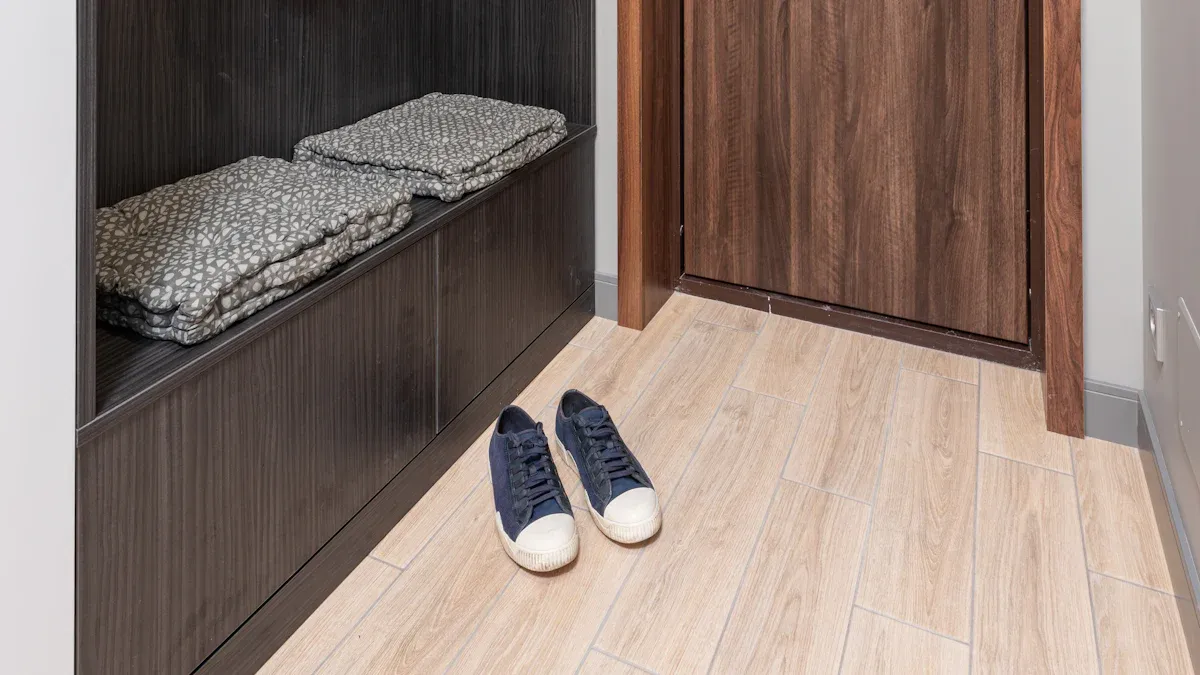
Is your entryway often a chaotic pile of shoes? You want a tidy, welcoming home. A diy wooden shoe organizer and entryway shoe storage bench provides a perfect answer. Building this diy project yourself is highly rewarding. You also save money compared to retail purchases. DIY furniture projects are often 99% cheaper, with potential savings of 70% to 90%. Materials for this specific shoe storage bench can cost as little as $50. You will create a custom bench that fits your space perfectly. You can achieve this with basic materials and easy assembly.
Why Build This DIY Entryway Shoe Storage Bench
Benefits of a DIY Project
Building your own entryway shoe storage bench offers many rewards. A diy project like this saves you money. You avoid the higher costs of buying pre-made furniture. You also gain valuable skills. Working on a project helps you develop problem-solving abilities. You learn to handle unexpected issues as they arise. This can be a great family activity. You can teach children practical skills. This fosters shared experiences and creates lasting memories. Creating your own diy shoe storage bench gives you a strong sense of accomplishment. You build a useful and beautiful piece with your own hands.
Solving Entryway Clutter
This bench directly addresses common clutter near your door. Shoe piles often accumulate. This creates a messy and unwelcoming space for guests and family. Your new bench provides a dedicated spot for shoe organization. It helps you keep your space tidy and functional. You can use the bench for comfortable seating when putting on or taking off shoes. It also offers valuable storage underneath for various items. This helps keep small items out of sight. You can maximize vertical space above the bench. Add hooks for bags, coats, or keys. This keeps your home’s entrance neat, organized, and welcoming.
Customizing for Your Home
You can design this shoe bench to perfectly fit your home’s unique style. Choose the wood type you prefer, from rustic pine to elegant oak. Select a finish that matches your existing decor, whether it’s a natural stain or a vibrant paint color. You decide the exact dimensions. This ensures the bench fits your available space without being too big or too small. You can add specific features. Maybe you need more shoe slots for a large family. Perhaps you want a wider seating area for comfort. This level of customization makes your furniture truly unique. It meets your specific needs and personal taste perfectly.
Planning Your DIY Wooden Shoe Organizer
Careful planning ensures your diy wooden shoe organizer fits your space and meets your needs. You need to consider several factors before you start cutting wood. This preparation phase saves you time and prevents mistakes during construction.
Bench Dimensions & Capacity
First, measure the area where your bench will sit. Consider the length, width, and height. Think about how many pairs of shoe you need to store. This helps you determine the overall size of your project. Standard entryway benches offer a good starting point for your design.
Component | Height | Width | Depth |
|---|---|---|---|
Overall Unit | 85” | 50” | 22” |
Bench | 18” | 48” | 22” |
You can adjust these measurements to fit your specific entryway. For example, if you have a narrow hallway, you might need a shallower depth. If you have many shoes, you might need a wider bench or more internal dividers.
Choosing the Right Wood
Selecting the right wood impacts your bench’s durability, appearance, and cost. You have several options, each with unique properties.
Fiberboard (like MDF) and Particleboard are very cheap. They come from recycled materials. Fiberboard is lighter than solid wood. Particleboard uses larger wood chips. It is less strong and easily damaged by moisture. These materials are not as strong or durable as natural wood.
Pine, poplar, and fir are affordable choices. Pine is easy to find and work with. Poplar takes paint well. These softer woods are less durable than hardwoods. They work best for painted furniture or light-use items.
Plywood costs less per surface area than solid hardwood. It comes in large, stable sheets. This reduces waste. Plywood is excellent for cabinets and shelving.
Consider this table for a quick comparison:
Wood Type | Durability | Cost | Notes |
|---|---|---|---|
Hardwoods (Walnut, Oak, Maple, Teak, Cherry, Mahogany) | More durable, stronger, denser | Higher price point | Good for high-end projects; Teak resists weather; Walnut is strong but easier to work. |
Softwoods (Fir, Pine, Poplar, Cedar, Spruce) | Less durable, can dent easily | More affordable | Common for budget builds; SPF (Spruce, Pine, Fir) needs protection outdoors. |
Engineboards (Fiberboard, Particleboard) | Significantly lower durability, not as strong as natural wood | Very cheap | Made from recycled materials; Particleboard is prone to moisture damage. |
You should choose a wood that matches your budget and how you plan to use the bench.
Essential Tools List
You need the right tools for any successful woodworking project. These tools help you cut, shape, and finish your wood accurately and efficiently.
Drill: This is a universal tool. You use it for making holes and driving screws.
Circular Saw: This saw is versatile. You use it for many cutting tasks.
Random Orbital Sander: This tool is essential for smooth surface finishing.
Router: You use a router for shaping edges and making joints.
Jigsaw: This saw is ideal for curved and detailed cuts.
Saws, drills, and sanders are crucial for effectively cutting, shaping, or finishing your project. They increase efficiency. They also provide precision. These tools reduce physical labor. They are vital for any woodworker. You will also need basic hand tools like a tape measure, a pencil, a square, and clamps.
Hardware & Finishes
The right hardware and finishes protect your diy wooden shoe organizer and enhance its look. You will need fasteners and adhesives to hold the pieces together.
Adhesive Type | Key Characteristics & Use Cases |
|---|---|
PVA Wood Glue | Used in furniture and cabinet making. Often used with fasteners. The glue provides final strength. Fasteners give temporary hold. |
Polyurethane Adhesives (e.g., Gorilla Glue) | Bonds wood, glass, concrete, metals. It is waterproof. You can paint it after setting. It needs moisture to cure. |
Epoxies | Versatile, long-lasting, heat-resistant. You can use it to glue wood, metal, plastic. It often reinforces fasteners. Two-part epoxies cure over many hours. |
Cyanoacrylate (Superglue) | Forms strong bonds quickly. It is good for small repairs. Bonds are brittle. It is not ideal for load-bearing joints. |
Fasteners | Used with adhesives. They hold joints tight while the glue cures. They provide temporary stability. |
You will also need screws or nails. Choose screws appropriate for your wood type and thickness. After assembly, you will apply a finish. This protects the wood and adds beauty. You can use wood stain to highlight the natural grain. Paint offers a solid color. A clear sealant provides protection without changing the wood’s appearance.
Building Your Simple DIY Shoe Bench

You are now ready to begin the hands-on part of your project. This section guides you through the steps to build a simple diy shoe bench. You will cut your wood, assemble the frame, add dividers, attach the back, and finish your bench.
Cutting Wood Pieces
Accurate cuts are crucial for a sturdy and good-looking bench. You start by marking your wood. Use a sharp pencil for fine lines on smooth wood. A marking knife helps you make precise joinery cuts and prevents wood from tearing out. For long, straight lines on large panels, a chalk line works best.
You must measure twice before you cut once. This helps you avoid mistakes. When you cut, always account for the saw’s blade width, also known as the kerf. Position your saw blade entirely on the scrap side of your mark. This ensures your piece has the correct dimension. For straight cuts, clamp saw guides or shoot boards to your material. Your saw shoe will bear against these guides, making a perfectly straight line. If you need many pieces of the same length, use length stops on your chop saw. This ensures all your cross-cuts are equal. For large pieces like plywood, you can check for squareness by measuring the diagonals. If the diagonals are the same length, your piece is square. You can also use the 3-4-5 triangle method to lay out square lines.
Assembling the Frame
Now, you will assemble the main frame of your bench. This construction step brings your design to life. For a simple diy shoe bench, you can use straightforward joinery methods.
Butt Joints: This is the easiest joint. Two pieces of wood meet, usually at a 90-degree angle. You fasten them with screws and wood glue. This joint needs reinforcement for stability.
Pocket Joints: You drill a hole at an angle through one board into the end of another. Then, you secure it with self-tapping screws. This method is popular for entry-level furniture because it is strong and easy.
Dowel Joints: You drill round holes into the pieces you want to join. Then, you insert cylindrical wooden dowels. You often glue these dowels for extra strength.
You will use wood glue on all joints. Glue provides the final strength. Screws give temporary hold while the glue dries. As you assemble, frequently check that your frame is square. This ensures your bench sits evenly and looks professional.
Installing Shoe Dividers
Your bench needs dividers to organize your shoes neatly. First, measure the height and depth of the internal space where your shoes will sit. Cut your divider pieces to these exact measurements. You can use pocket screws or small L-brackets to attach the dividers. Position them evenly to create individual compartments for each pair of shoe. This keeps your footwear tidy and easily accessible.
Attaching the Back Panel
The back panel adds stability to your bench and gives it a finished look. For plywood back panels, you can glue them in place. Wood movement is not a concern with plywood. You can also use a nail gun with 5/8-inch brad nails. Apply these nails around the perimeter and into any cross members. Air-driven 1/4-inch staples offer a quick and secure method for attaching 1/4-inch thick plywood panels. If you use solid wood for your back panel, like shiplap, nails are the best choice. Small hand finish nails are effective, especially if you worry about blowout from pneumatic nailers. You can also frame the back panel by cutting a rabbet, placing the panel flush, and then gluing overlapping strips. This creates a clean, recessed look.
Sanding & Finishing
Sanding is a critical step. It smooths the wood and prepares it for finishing. Start with a coarser grit sandpaper, like 80 or 100-grit, to remove any rough spots or imperfections. Then, move to a finer grit, such as 150 or 220-grit, for a silky-smooth surface. You can use a random orbital sander for efficiency.
After sanding, wipe down the bench to remove all dust. Now, you can apply your chosen finish. You can use wood stain to highlight the natural grain of the wood. Paint offers a solid color that matches your decor. A clear sealant or polyurethane provides protection without changing the wood’s appearance. Always apply finishes in a well-ventilated area. Allow each coat to dry completely before applying the next. This final step protects your bench and makes it beautiful.
Personalizing Your Entryway Bench
You can make your new bench truly unique. Personalization adds comfort and style. It also increases functionality.
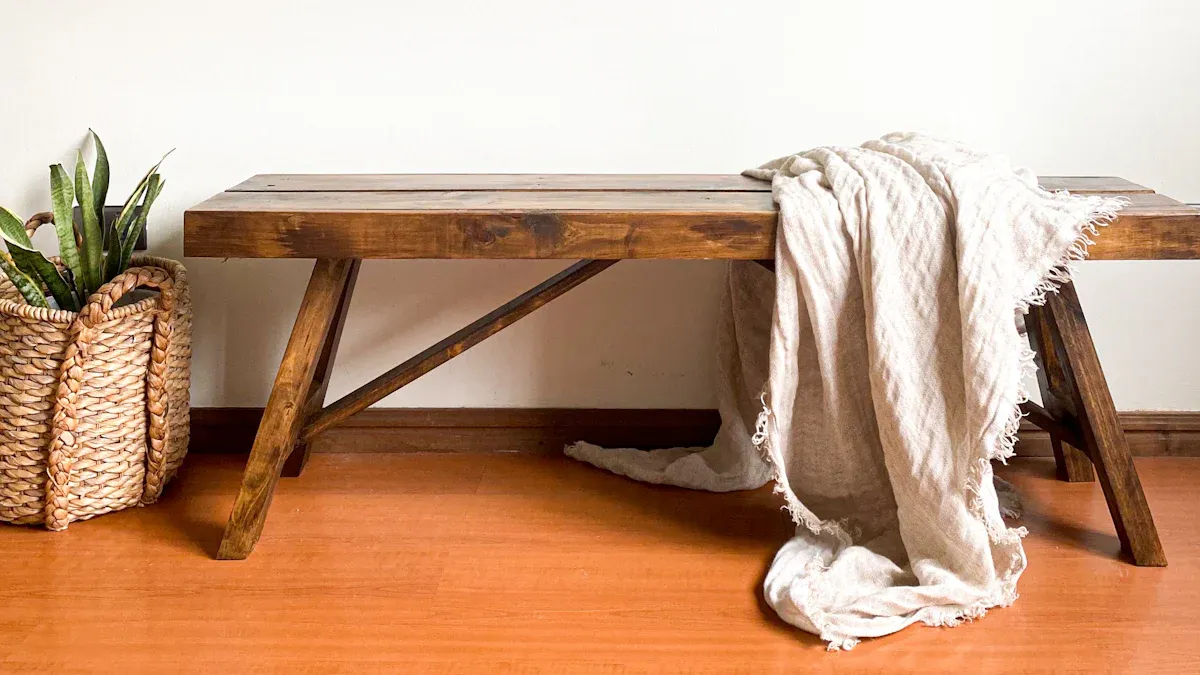
Adding Comfort Cushions
A cushion makes your bench more comfortable. You can sit down to put on or take off shoes. Choose a fabric that matches your home decor. You can buy pre-made cushions. Or, you can sew your own. Measure the top of your bench. Cut foam to size. Cover the foam with your chosen fabric. This simple addition transforms your bench into a cozy seating area.
Incorporating Hooks
Hooks add valuable vertical storage. They keep your entryway tidy. You can choose from different hook types. Individual hooks offer flexibility. You can arrange them at different heights. This works well for both children and adults. Hook racks provide an all-in-one solution. They are easy to install. Multi-functional hooks offer extra features. Some have shelves for mail. Others include mirrors or even LED lighting. You can choose materials for modernity. Stainless steel gives a sleek look. Wooden hooks add warmth. Matte black finishes create a bold statement. Brass or gold finishes add elegance. These hooks help you declutter. They provide designated spots for coats, hats, and bags.
Finishing Techniques
Finishing your bench allows you to express your style. Basic wood staining highlights the wood’s natural grain. You sand the wood. Then you apply stain with a cloth. You seal it with a protective finish. For a rustic look, try the weathered technique. You distress the wood with tools. Then you apply a gray or brown stain. The two-tone effect uses two different stain colors. This creates depth and contrast. The classic whitewash gives a soft, muted finish. You mix white paint with water. You apply this mixture to the wood. The ombre technique creates a gradual color change. You use multiple shades of stain. You blend them for a seamless gradient.
Storage Variations
You can customize the internal storage of your bench. Add more shoe slots if you have a large family. You can create taller compartments for boots. Consider adding small drawers for keys or gloves. You can also build shelves for baskets. These baskets hold hats or scarves. Think about what you need to store. Design the internal layout to meet those needs.
Safety & Best Practices
You must prioritize safety when you work with wood. This protects you from injury. It also ensures a successful project. Follow these guidelines for a safe and efficient build.
Essential Safety Gear
You need proper personal protective equipment. This gear keeps you safe.
First Aid Kit: Keep one nearby. It helps with quick injury response.
Dust Masks & Respirators: Wear these to protect your lungs. Sawdust particles can harm you. Finishes release VOCs. Masks filter 95% of particles. Respirators need special cartridges for VOCs.
Hearing Protection: Use earbuds or earmuffs. Power tools are loud. They can damage your hearing. Look for a Noise Reduction Rating (NRR) of at least 20 dB.
Safety Glasses & Goggles: Protect your eyes from flying debris. Tools like routers and table saws create chips.
Woodworking Apron: This protects you from kickbacks. It also guards against sharp tools.
Push Paddles & Push Sticks: Use these with power tools. They keep your hands away from spinning blades.
Secure Workpiece Setup
You must secure your wood pieces. This prevents movement during cutting and assembly.
Vacuum Tables: These use suction to hold materials. Ensure a good seal. Check pump performance.
Mechanical Fixturing: Use clamps or pins for large sheets. Adhesive mats work for light materials. Custom jigs help with odd shapes.
Small-Part Management: Use sacrificial layers. Holding tabs prevent small parts from shifting. Remove small parts only after the cutting head stops.
Proper Ventilation
Woodworking creates dust and fumes. These can harm your health. Hardwood dust can cause asthma. It irritates your nose and sinuses. Some woods link to nasal cancer. You can also experience skin irritation. Headaches and nausea are possible. Other substances like paint and glue add risks.
You need good ventilation.
Open windows and doors. This lets fumes and dust escape.
Use fans. Place them to bring in fresh air. They can push out stale air.
Install dust collection systems. These range from shop vacs to whole-shop setups. Cyclone systems collect tiny particles.
Wear a high-quality respirator if you lack a system.
Accurate Measurements
Accurate measurements are very important. They ensure your project fits together well. Even small errors cause problems. Your components might not align. The structure could be unstable.
You should invest in good measuring tools. Choose tools made of durable materials. Stainless steel or heavy-duty aluminum are good choices. Look for clear markings. Magnetic hooks and shock-resistant casings are helpful. Wood changes size with moisture. You must understand this.
Your new diy wooden shoe organizer declutters your entryway. It adds style. You feel satisfied with your handmade item. This is a rewarding endeavor. Start your own project today. Careful planning and execution help you. You can create a beautiful, functional piece, even a simple diy shoe bench. Remember planning, step-by-step construction, and personalization. Transform your entryway. Enjoy your custom-built bench. This entryway shoe storage bench will serve you well.
FAQ
What type of wood is best for this shoe bench?
You can choose different woods. Pine or poplar are good for beginners. They are affordable. Hardwoods like oak offer more durability. Select wood based on your budget. Consider how you will use the bench.
How long does this project take to build?
Building time varies. It depends on your skill level. A simple design might take a weekend. More complex designs need more time. Careful planning speeds up the process. You will enjoy the building experience.
Can I paint my finished bench?
Yes, you can paint your bench. First, sand it smooth. Use a primer. Then apply your chosen paint color. This lets you match your home decor perfectly. You can also use stain for a natural look.
What if I am new to woodworking?
This bench is suitable for beginners. Start with simple designs. Follow each step carefully. Watch online tutorials. You will gain confidence with practice. Enjoy the learning process. Everyone starts somewhere.


