
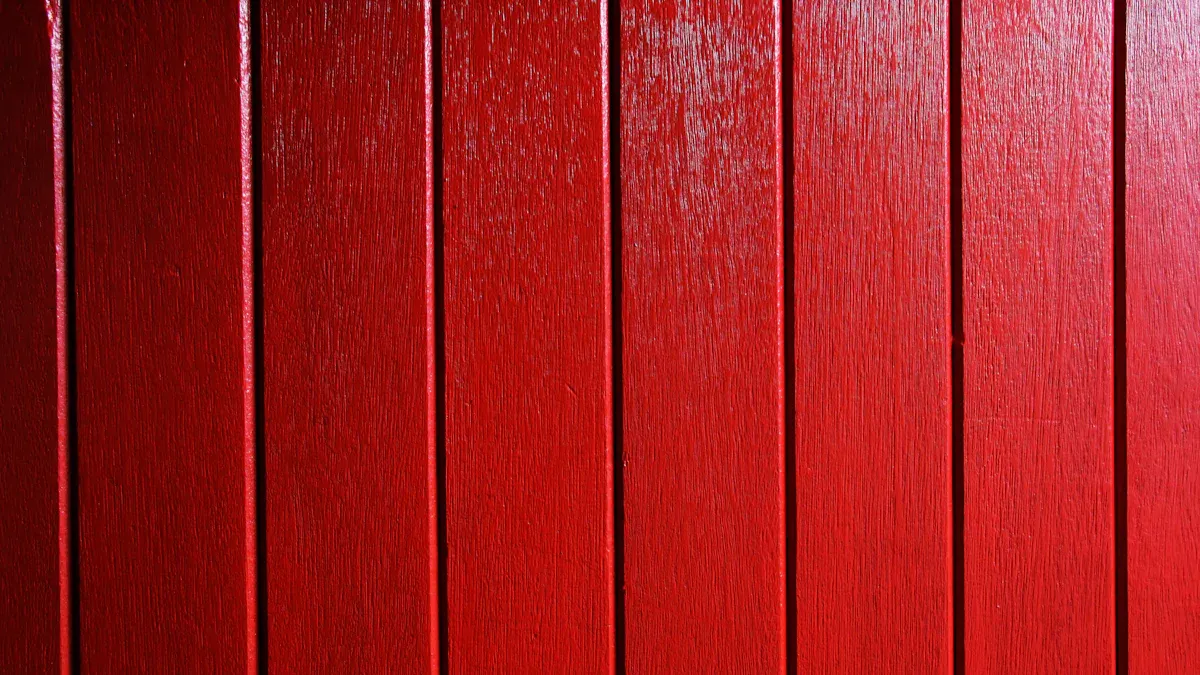
You want a rich red mahogany stain on your wood. Achieving this beautiful finish yourself brings immense satisfaction. Many people enjoy DIY home improvement projects. The U.S. wood stain market grows by 7.5% each year. This guide provides a clear, step-by-step guide for you.
You will transform your item into a stunning mahogany wood finish. This tutorial covers everything from preparation to the final protective coat. You will master mahogany wood stain application. This process gives a deep mahogany color.
Understanding Red Mahogany Stain
Defining a Rich Red Mahogany Finish
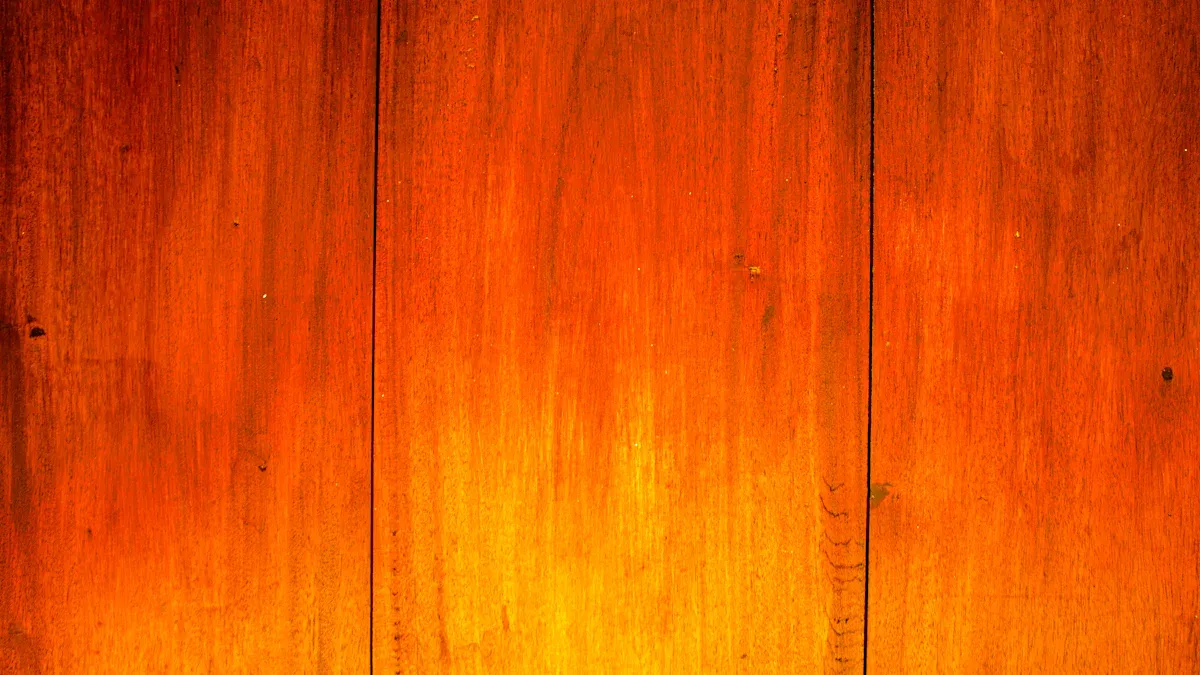
A rich red mahogany finish offers a deep, luxurious appearance. This finish features a deep and rich color with a slight red background. Rich tone stains contain extra pigment. This achieves deeper color intensity. You will notice the richness of the effect. Layering different tones enhances this. This helps to even out value. It also creates subtle shifts in tone across the piece. Layering can help manage blotching. However, applying too much color too soon can cause issues. Heavily staining to mask underlying wood colors, like green in poplar, can lead to a loss of grain clarity.
Types of Wood for Mahogany Finish
You can achieve a beautiful mahogany look on various wood types. Mahogany wood is prized for its durability, workability, and elegant appearance. It typically exhibits a pink or reddish-brown hue. This deepens over time. The grain is straight and uniform. It is generally free of knots or blemishes. This contributes to its smooth and refined look. Red Mahogany is an Australian hardwood. It is known for its fine grain and striking red coloring. Its heartwood ranges from red to dark red. The sapwood is distinctly paler. The grain is generally even and moderately textured. Sometimes it is interlocked. This creates an attractive figure. This wood is highly valued for its durability. It resists termites. Its distinctive color makes it suitable for furniture.
Oil-Based vs. Water-Based Stains
Choosing the right stain type is crucial for your project. Oil-based stains and water-based stains have key differences. Oil-based wood stain soaks deep into wood fibers. It offers forgiving application. You will not see laps, runs, or streaks. Water-based wood stain forms a surface film. It requires quicker, more precise application. This avoids lap marks. Oil-based stains dry in 24–48 hours. Water-based stains dry in 1–6 hours. Oil-based stains resist cracking, peeling, and UV damage. They offer long-lasting protection. Water-based stains are prone to peeling and flaking. They show premature wear, especially outdoors. Oil-based stains are more forgiving. They provide streak-free application. This minimizes blotching. Water-based stains’ faster drying time requires precise application. This helps avoid lap marks. These can relate to blotching if not handled carefully. For a deep mahogany wood stain, oil-based options are often recommended. They minimize blotching, especially on challenging woods. Water-based stains can cause blotching where applicator strokes end or change. Consider an oil-based mahogany wood stain for best results.
Essential Tools and Materials
Before you begin your project, gather all necessary tools and materials. Prepare your workspace first. Clear the area and ensure good ventilation. This makes your staining process smooth and safe.
Stain and Applicators
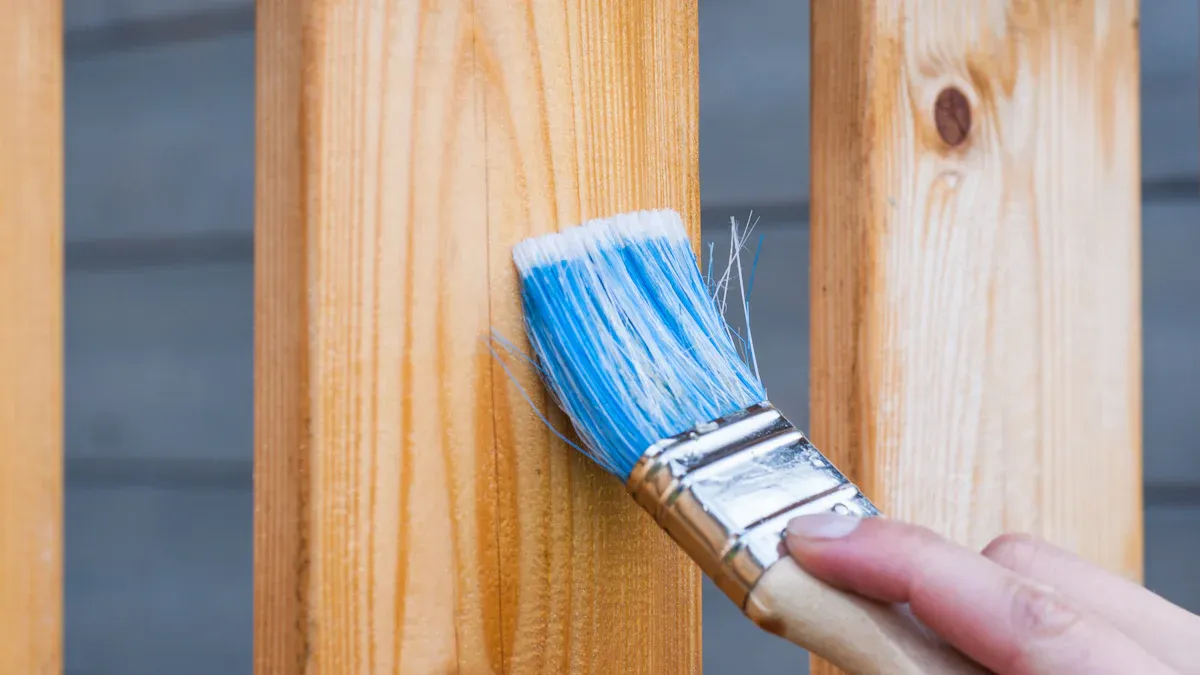
You need the right stain and tools to apply it. Choose your red mahogany stain carefully. You will also need various applicators. Use natural bristle brushes for smooth application. Clean rags work well for wiping off excess stain. Foam pads offer another option for even coverage. These tools help you achieve a consistent mahogany wood stain finish.
Sanding and Wood Conditioner
Proper wood preparation is key. You need various grit sandpaper. Start with coarser grits and move to finer ones. Sanding to approximately 180 grit helps prevent blotching. Blotching happens when wood absorbs stain unevenly. This creates dark patches. A wood conditioner or pre-stain is also essential. It reduces the overall absorption of color. This results in a blotch-free surface. The final color may appear lighter, but it will be even. This method controls uneven stain penetration effectively.
Safety Gear and Topcoats
Your safety is important during the application process. Always wear gloves to protect your hands. Goggles shield your eyes from splashes. Use a respirator or face mask when applying stain or topcoats. This protects your lungs from fumes. Finally, you need a protective topcoat. This seals and protects your finish. Common protective topcoats include polyurethane and lacquer. A good topcoat ensures your mahogany finish lasts.
Step-by-Step Application of Red Mahogany Stain
Achieving a professional-quality mahogany wood stain finish requires careful attention to each step. This step-by-step guide provides you with the necessary instructions for a flawless mahogany wood stain application.
Wood Surface Preparation
Proper preparation of your wood surface is crucial. It ensures the stain absorbs evenly and creates a beautiful finish. First, clean all surfaces. Remove any dirt or oils before you begin sanding.
Next, you will sand the wood. Do not start with very fine sandpaper on unfinished wood. Begin with a medium grit and gradually move to finer grades. This progression removes imperfections and prepares the wood for optimal stain absorption.
Here is a general sanding progression:
General Raw Wood: Start with #120-150 grit. Progress up to #220 grit before staining.
Soft Woods (Pine, Alder): Start with #120 grit. Finish with no finer than #220 grit for water-based stains. Finish with #180 grit for oil-based stains.
Hardwoods (Maple, Oak): Start with #120 grit. Finish with no finer than #180 grit for water-based stains. Finish with #150 grit for oil-based stains.
You must match the abrasive type to your wood species. For hardwoods like oak or maple, use durable abrasives such as aluminum oxide. Softwoods like pine require less aggressive abrasives, like garnet, to prevent gouging. Exotic woods with irregular grain benefit from silicon carbide abrasives. These cut aggressively with less pressure, avoiding dig-ins.
Determine your starting grit based on the wood’s condition. Use 60-80 grit for rough lumber or finish removal. Begin with 100-120 grit for dimensioned lumber with mill marks. If you are smoothing already prepared surfaces, start at 150 grit. Always use the finest grit that effectively addresses the surface issues.
Plan your grit progression carefully. Each finer grit removes scratches from the previous one. A typical progression is 80 grit (initial shaping), then 120 grit (smoothing), 180 grit (refining), and finally 220 grit (finishing). For stained woods, you might go up to 320 grit. For oil finishes, stop at 180-220 grit. This ensures better oil penetration.
Avoid over-sanding. Over-sanding can seal the wood. This prevents it from absorbing the finish properly. Give end-grain areas an additional sanding. End-grain absorbs more stain. This extra step helps control stain absorption. After sanding, thoroughly remove all dust. Use a vacuum or a tack cloth.
Applying Wood Conditioner
Applying wood conditioner is a critical step. It ensures even absorption of the stain. This prevents blotchiness, especially on challenging wood types.
First, gently stir the wood conditioner. This ensures a consistent formula. Next, apply the conditioner evenly across the wood surface. Use a natural bristle brush, foam brush, or clean cloth. Work in the direction of the grain. Ensure complete coverage without overapplying.
Allow the conditioner to penetrate the wood. Follow the recommended time on the product label. This is typically 5 to 15 minutes. Do not let it dry completely. After penetration, wipe off any excess conditioner. Use a clean, dry cloth. This prevents blotchiness.
Allow the wood to dry. Follow the conditioner’s instructions. This can range from 15 minutes to a couple of hours. You must apply the stain within two hours after conditioning. This ensures optimal results.
Applying Red Mahogany Stain
Now you are ready to apply the mahogany wood stain. First, stir the red mahogany stain thoroughly. This ensures the pigments are well mixed.
Apply the stain evenly. Use a brush or cloth. Ensure your application follows the direction of the wood grain. Work in manageable sections. This prevents overlaps and inconsistencies in drying.
Allow the stain to sit for the manufacturer’s recommended time. This is typically around three minutes. After 5–15 minutes, wipe off any excess stain. Work with the grain. This helps you achieve your desired color depth.
For a deep red antique mahogany color, you can use a combination of dye, filler, and stain. For example, you might use General Finishes Merlot Water-Based Dye with General Finishes Brown Mahogany Gel Stain. Another option involves Solar Lux aniline dye (medium brown walnut color, which dries with a maroon red color), Old Masters Woodgrain filler, and Zar oil stain (Early American color).
Consider using a tinted woodgrain filler for mahogany pores. Mix filler and stain in a 2:1 ratio. Work it into the wood with a rag, brush, or scraper. For a close match to a mahogany wood finish, General Finishes “Java” mixed with some Red Mahogany is often effective. These step-by-step application tips help you achieve a rich, deep color.
Achieving Color Depth
You can deepen the finish by applying multiple coats. Applying a second coat of gel stain is optional. It can deepen the color. However, do not apply more than two coats. When you apply multiple coats, especially over an existing finish, you must increase dry times. For recoating with stain, whether you wipe it off or paint it on, a dry time of 72 hours is recommended. This applies in ideal conditions (70°F/20°C, 50% humidity). Inadequate dry time is a common cause of finish failure. Extend dry times if humidity is over 80%, you apply three or more coats, or you use thick coats. If the stain is still tacky after 5 days, you have not met the dry time requirements. These step-by-step application tips ensure proper layering.
Applying the Topcoat
After the stain dries completely, you will apply a protective topcoat. This seals and protects your beautiful mahogany finish. Choose the right type of topcoat for your project. Options include polyurethane, lacquer, or varnish.
Apply the first coat of your chosen topcoat. Apply it thinly. This coat typically goes over a sanded primer. The primer is designed for optimal paint adhesion. After the first coat, or subsequent coats, light sanding is recommended. Do this before applying the next layer.
Sanding is especially important when you apply the final topcoat over a smooth or shiny previous coat. Latex paint adheres poorly to such surfaces. Light sanding helps achieve better adhesion. This is crucial for surfaces prone to wear and tear, like bookshelves or cabinets. Sanding also contributes to a smoother and more flawless finish. It removes imperfections like brush strokes, dust nibs, or air bubbles. Consider sanding between coats when you use high-gloss paints. This ensures strong adhesion. For high wear and tear surfaces (e.g., furniture, shelves, cabinets, doors, trim, painted floors), sand between primer coats and between new paint coats. This enhances adhesion and durability. Allow each topcoat to dry fully according to the manufacturer’s instructions before applying the next.
Troubleshooting Common Issues
Even with careful planning, you might encounter issues during your staining project. Knowing how to troubleshoot these common problems helps you achieve a perfect red mahogany finish.
Uneven Stain and Blotching
Blotching is a common problem. It happens when wood absorbs stain unevenly. This creates unsightly dark patches. You can prevent this issue. Oil-based stains are generally recommended. They minimize blotching, especially on challenging woods. Water-based stains can cause blotching where applicator strokes end or change.
You can prevent blotching in several ways. Sanding to higher grits helps. Applying commercial pre-stain conditioners also works. You can also pre-seal the wood with dewaxed shellac. These methods prevent blotching. However, they can also reduce overall color absorption. This might result in a lighter finish than you intended. A product like Charles Neil’s Pre-Color Conditioner offers an improved solution. It prevents blotching. It also allows better stain penetration. This works even on blotch-prone woods like pine and cherry.
Other factors can cause uneven stain application:
Mixing Different Types of Stains: Combining water-based and oil-based stains can lead to problems. You might see adhesion issues, chemical reactions, and unpredictable color. Stick to one type and brand of stain. If issues arise, strip the finish. Then restart with a consistent product line.
Not Testing the Stain: Skipping stain testing can lead to unexpected color. Always test the stain on a hidden area. Use a scrap piece of the same wood. Follow all preparation steps. This lets you make adjustments before applying to the entire project.
Shaking Rather Than Stirring Stain: Shaking introduces air bubbles. This causes a spotty, uneven finish. Always stir the stain thoroughly. Scrape the bottom to mix settled pigments. If you shake it, let it sit for several hours. This allows bubbles to dissipate.
Using Expired Products: Old stain can cause poor color. It can also lead to inconsistent drying. Check the manufacturer’s date. Look for unusual separation, odors, or a gel-like consistency. If you find these, use a fresh product.
Using the Wrong Tools: Incorrect applicators cause streaky application. They also lead to uneven coverage. Select tools based on stain type and project needs. Use lint-free rags for penetrating stains. Use natural bristle brushes for oil-based stains. Synthetic brushes work for water-based stains. Apply with the correct techniques for each tool.
Staining Against the Wood Grain: Applying stain against the grain creates visible marks. Always apply stain in the direction of the wood grain. Use long, even strokes. This allows proper penetration. Correct this by lightly sanding. Then reapply with the grain.
Unevenly Applying Stain: Inconsistent pressure or overlapping can create lap marks. Work in manageable sections. Maintain a wet edge. Use consistent pressure. Overlap slightly. Correct this by blending while wet. Or, light sand and reapply if dry.
Leaving Excess Stain on the Surface: Excess stain does not deepen color. It creates a thick, sticky layer. This obscures the grain. Apply thin, even coats. Allow penetration for 5-15 minutes. Then wipe off all excess with a clean, lint-free cloth. For darker color, apply multiple thin coats.
Environmental Factors: Temperature, humidity, and air circulation affect stain penetration. They also impact drying and curing. Avoid staining in extreme conditions. Stain when temperatures are 70-75°F. Humidity should be 40-70%. Ensure good air circulation.
Correcting Color Issues
Sometimes, your red mahogany finish might not be the exact color you wanted. You can correct color issues.
If your finish is too dark, you have several options to lighten it. You can sand the stained wood. This removes the top surface and old finish. This works for most stains. It requires effort, especially on detailed pieces. Wood bleaching solutions chemically change wood color molecules. This is ideal for dramatic brightening. It also eliminates unwanted tones. Always use safety precautions. You can also use a paint wash. Diluted paint can be applied to finished wood. This allows the wood grain to show through. It gives a lighter finish. Steel wool can lighten wood with a thin topcoat. Dip fine steel wool in water. Gently rub along the wood grain. Then clean with mineral spirits. Chemical wood bleach techniques are also available. After removing any sealer, apply bleach as recommended. Neutralize the surface afterward. DIY wood bleaching options include two-part (A/B) bleach. This uses sodium hydroxide and hydrogen peroxide for dramatic lightening. Oxalic acid works for water, iron, or rust stains. Chlorine bleach offers milder lightening. It works for dye-based stains. Thorough stripping and sanding are crucial before bleaching. Safety gear is paramount.
If your finish is too light, you can darken it. The most common method is to apply additional coats of your chosen stain. Each coat deepens the color. Always allow proper drying time between coats. This prevents issues with adhesion and unevenness. You can also use a darker shade of stain for subsequent coats. This helps achieve a richer, deeper mahogany color.
Topcoat Imperfections
Even after careful staining, your topcoat might show imperfections. You can fix these issues.
Air Entrapment (Craters): These are small crater-like openings in the paint film. They happen when trapped air pockets rise and burst. This can be due to slow spray gun travel or low air pressure. To correct this, sand with 1200 grit or finer sandpaper. Then compound and polish to restore gloss. Or, sand smooth and refinish. Prevent this by maintaining correct spray gun speed and distance. Use recommended air pressure.
Bleeding (Discoloration): You might see red or yellow discoloration in the topcoat. This occurs when the new topcoat’s solvent dissolves dyes from the original finish. These dyes then seep into the new topcoat. To correct this, allow the color to cure. Isolate it with two-component undercoat(s). Then refinish. Or, remove the original paint film and refinish. Prevent bleeding by isolating suspected finishes with a two-component surfacer or sealer. Allow it to cure before applying the topcoat.
Blistering (Pimples, Bubbles, Bumps): These are swelled areas in the topcoat film. They often appear months after application. Moisture trapped beneath the paint film causes this. This can be from improper dry time after wet sanding. It can also be from contaminated air lines or high humidity. To correct this, remove the affected area and refinish. Extreme cases require stripping to the bare wood before refinishing. Prevent blistering by allowing sufficient dry time after wet sanding. Drain moisture from your compressor regularly. Allow additional flash time in humid conditions.
Dealing with Existing Finishes
You might work on a piece of wood that already has a finish. You need to decide whether to strip or sand it. Both methods prepare the surface for a new mahogany wood stain.
Stripping removes old finish or paint using chemical strippers. This is excellent for removing multiple layers of paint or thick finishes. It can reach intricate details. Stripping can be faster for large areas with many layers. However, it requires dwell time for chemicals. It involves less physical effort for removal. But it requires careful handling of chemicals and thorough cleaning. Stripping can be messy with chemical residue. It requires proper disposal. Chemicals can damage wood if left too long. They can also raise the wood grain. Stripping involves hazardous chemicals. You need ventilation, gloves, and eye protection. Chemical strippers can be expensive. They can also harm the environment if not disposed of properly. Stripping is best for intricate carvings or antique furniture. It works well for removing many layers of old paint or varnish.
Sanding removes old finish or paint by abrading the surface with sandpaper. This is effective for removing thin layers of finish. It also works for minor imperfections. Sanding prepares surfaces for new finishes. It is generally slower for extensive removal. But it is quicker for light preparation. Sanding requires more physical effort. However, it is less hazardous than chemicals. Sanding produces fine dust. This can be airborne. It requires dust collection and cleanup. You can remove too much wood with sanding. You can also create uneven surfaces. Or, you can leave swirl marks if you do not sand carefully. Sanding leaves a smooth, prepared surface ready for finishing. It produces dust. You need a dust mask and eye protection. Power sanders can be noisy. Sandpaper and sanding equipment can be a recurring cost. Dust can be an irritant. Sanding has less environmental impact than chemical strippers if you contain the dust. Sanding is good for smoothing wood. It removes minor scratches. It prepares wood well for new finishes.
Even after bleaching wood and using certain gel stains, a slight red hue may persist. This is especially true if the original wood had a strong red undertone.
Maintenance and Care for Your Finish
You want your beautiful red mahogany finish to last. Proper care and maintenance keep your wood looking its best. Follow these guidelines for maintaining your mahogany finish.
Cleaning Recommendations
You should not clean mahogany excessively. Never use abrasive cleaners. They cause discoloration, staining, and remove the finish. Avoid anything harsh to the wood finish. Keep mahogany away from excessive moisture. Never use a pressure washer to clean mahogany decks or outdoor furniture. If you use water, use a damp cloth. Do not use a soaked one. Avoid exposing mahogany to excessive sun.
Protecting from Damage
You can protect your red mahogany finish from scratches and moisture. Apply a thicker finish. This offers greater resistance to both liquid and vapor forms of moisture. For instance, three coats of finish provide more protection than one or two. Some finishes like wax, boiled linseed oil, and 100% tung oil offer minimal thickness or protection. More durable options exist. Polyurethane is strong. It resists damage. It was initially a no-wax floor finish. Other durable alternatives for spraying include pre-catalyzed or catalyzed lacquer and conversion varnish. They dry quickly. They are as durable as, or even more so than, polyurethane. This extra protection helps your mahogany wood stain endure.
Re-finishing and Touch-ups
Sometimes your finish needs a refresh. For a full re-finish, you can follow these steps:
Apply a coat of General Finishes Merlot Water-Based Dye.
Apply a coat of General Finishes Brown Mahogany Gel Stain.
Finish with a satin lacquer topcoat.
For a more detailed re-finishing process, especially for a deep red antique mahogany color:
Prepare the wood surface. Sand it to 180 or 220 grit.
Dilute Solar Lux aniline dye by 50% with water. Apply it. Work quickly with a sponge. Avoid pooling.
Let the dye dry. Lightly sand with a fine-grit sanding sponge. This evens the color. It knocks down raised grain.
Repeat dye application and sanding. Do this until you achieve the desired shade. Remember, the final finish will darken the dye.
Apply a coat of Zinsser SealCoat after the dye is dry. Work quickly. Prevent drips or pooling.
After the sealer dries, lightly scuff sand with a synthetic abrasive finishing pad. Do this if you see nibs or bumps. Be careful not to sand through the dye.
Mix Old Masters Woodgrain Filler with a dark brown oil stain (e.g., Zar Early American) in a 2:1 ratio.
Apply the tinted woodgrain filler with a rag, brush, or scraper. Work it into the pores. Let it dry for about 5 minutes. Then scrape it off across or diagonal to the grain.
Allow the filler to dry for about 4 hours. Reapply if necessary. You can also sand it.
Apply the topcoat: 3 coats of Zinsser SealCoat. Sand between each with 220 grit. Follow with 3 coats of spray lacquer. Also sand between each coat.
Buff and polish once the topcoat is ready.
You now have a comprehensive guide for achieving a rich red mahogany finish. Remember the importance of proper wood preparation and careful stain application. Patience is key throughout the process. You can transform ordinary wood into extraordinary works. Apply these skills to your projects. You will enjoy the rewarding outcome of a beautifully stained piece.
FAQ
What is the best wood for red mahogany stain?
You can use various woods. Mahogany itself is excellent. It has a fine grain and reddish hue. Other woods like oak or maple also take red mahogany stain well. Always test on a scrap piece first.
What is the difference between oil-based and water-based stains?
Oil-based stains penetrate deeply. They offer forgiving application and minimize blotching. Water-based stains dry faster. They form a surface film. You need quicker, more precise application to avoid lap marks.
What causes blotching and how can you prevent it?
Blotching happens when wood absorbs stain unevenly. You can prevent it. Use an oil-based stain. Apply a wood conditioner before staining. Sand the wood properly. This helps ensure even absorption.
What should you do if your stain is too dark?
If your stain is too dark, you have options. You can sand the wood to remove some color. You can also use wood bleaching solutions. A paint wash can lighten the finish. This guide helps you choose the right method.
What is the ideal temperature for applying stain?
You should apply stain in moderate temperatures. Aim for 70-75°F (21-24°C). Humidity should be between 40-70%. Avoid extreme heat or cold. These conditions affect drying and curing times.

