Do you love diy projects that are affordable and sustainable? Two-thirds of homeowners choose diy for cost savings. A strong diy commitment to eco-friendly solutions, like reclaimed wood, exists.
This chart shows how important sustainability is for diy groups.
That’s where diy wood pallet crates shine. These rustic pallet crates offer rustic storage ideas for your decor. You transform pallets into stylish crates, an easy diy way to get unique storage. Pallet projects are satisfying. Give wooden crates and pallets new life, creating functional storage crates.
Key Takeaways
Choose safe pallets for your DIY projects. Look for the ‘HT’ stamp, which means the wood is heat-treated and safe. Avoid pallets marked ‘MB’ because they have toxic chemicals.
Gather the right tools to take apart pallets. You need gloves, eye protection, a mask, a pry bar, a hammer, and a saw. These tools help you work safely and easily.
Clean and prepare your pallet wood well. Sand the wood to make it smooth. Then, stain or paint it. Always add a sealant to protect your finished crates.
Use your finished pallet crates in many ways. They can be coffee tables, shelves, or nightstands. You can also use them for pantry storage or outdoor planters.
Sourcing & Preparing Pallets
Before you build beautiful crates, you need good wood. Finding the right pallet is your first step. This part is crucial for your safety and the success of your diy project.
Finding Safe Pallets
You want to find safe pallets for your diy crates. Look for pallets from local businesses or online marketplaces. Always avoid pallets that look stained or smell bad. The most important thing is to check the stamps on the wood.
Heat-Treated (HT) Pallets: These are the ones you want! Look for an ‘HT’ stamp. This means the
palletwood was heated to kill pests. It has no chemical preservatives. You might also see the IPPC (International Plant Protection Convention) symbol.Chemically Treated (MB) Pallets: You must avoid these. An ‘MB’ stamp means the
palletwas treated with methyl bromide. This is a toxic chemical. Other stamps like ‘CCA’ or ‘ACQ’ also mean chemical treatment.
Choosing HT pallet wood keeps your home safe.
Essential Disassembly Tools
Taking apart a pallet can be tough. You need the right tools to make it easy. Safety is also key.
Thick gloves: These protect your hands from splinters and nails.
Eye protection: Always wear safety glasses, especially when using power tools.
Mask or respirator: This is critical. You do not want to breathe in wood dust when you saw or sand.
Pry bar and hammer: These help you separate the
palletplanks.Saw: A reciprocating saw or circular saw makes cutting
palletwoodeasy.Metal detector: Use this to find hidden nails. It saves your saw blades.
Consider getting a tetanus shot too. It protects you from nail-related injuries.
Cleaning & Inspecting Wood
Once you have your pallet wood, you need to clean it. This removes dirt and makes your crates look great.
First, spray the pallet surface with a hose or pressure washer. This gets rid of loose debris. Then, you can disinfect the wood.
Disinfecting: Mix water, dish soap, and bleach. Use a scrub brush for tough grime.
Natural cleaning: For a bleach-free option, use water and vinegar.
After cleaning, rinse the wood well. Let it dry completely in the sun. The sun’s UV rays help disinfect it. Even if a pallet is heat-treated, always clean it thoroughly. Wood is porous and can hide bacteria. Finally, inspect each piece of pallet wood. Look for any remaining nails or splinters. Remove them before you start building your crates.
Basic Crate Construction
Now you have clean pallet wood. What kind of crate do you want to build? Think about what you will put inside your new crates. This helps you decide on the right size and style. Do you need open-top crates for easy access? Or maybe lidded crates for hidden storage?
Crate Dimensions & Design
Choosing the right size for your crates is important. For common household storage, like books or toys, standard cubby shelves are often 13 inches. Making your crates this size means they will fit perfectly into many existing units. If you are building a toy box, a good size is usually around 24 inches by 36 inches. A height of 16 to 20 inches works well. This size holds many toys and fits nicely in most rooms.
You can sketch your design. Decide how many planks you need for each side and the bottom. Measure your pallet planks. Then, mark where you will cut them. Remember to measure twice and cut once! This makes your diy project much easier. Working with pallet wood is very satisfying.
Assembling Sides & Base
Now you have your cut pieces. It’s time to put your crates together. This is where your pallet wood starts to look like something! You need to join the planks securely.
“Choosing the right construction fasteners is more than just a technical decision—it’s about ensuring your pallets stand up to the challenges of real-world use. At Olympic Forest Products, we’re dedicated to helping you make informed choices that enhance your pallets’ performance and longevity. Our team is here to provide tailored solutions that fit your specific needs and keep your operations running smoothly.” — Dave Groudle, Chief Operating Officer, Olympic Forest Products
You have a few choices for fasteners. Nails are common for pallet construction. They are simple and effective. Screws offer a stronger hold. Their threaded design makes connections more durable. They are great if you want your crates to last a long time. For hardwood pallet wood, helically threaded nails work best. They twist into the dense wood for a strong bond. For softer pallet wood, annually threaded nails are better. Their ringed shank grips the softer fibers well. You are building strong crates from reclaimed pallet material. Each piece of pallet wood tells a story.
Here are the steps to build your basic open-top crates:
Build the End Pieces: Grab two shorter planks for each end. Use a scrap piece of wood, like 3/4″ pine, to keep the spacing even between your slats. Clamp a piece of plywood to help align the ends of your slats. Put wood glue on the end slats where your support slats will go. Then, use 1-1/4″ brad or finish nails to secure them.
Attach Side Slats: Make sure the support slats on your end pieces face outward. Work on a flat surface. Put glue on the end grain of your end slats and along the support piece. Take a longer side slat. Place it onto one end slat assembly. Line it up and check that it is square. Use a nail gun or hammer to drive a 2″ finish or brad nail through the side slat into the end slat assembly. Do this for the other end slat assembly. Once it is square, add three more nails at each end. Two go into the end grain, and two go into the support piece. You can use a 3/4″ pine handle as a guide for proper board spacing. Repeat this for all your side slats. Flip your crate assembly over. Attach slats to the other side. Always check for squareness and adjust before you nail.
Make the Bottom: Cut a piece of 1/4″ plywood to fit the bottom of your crate. Leave about 1/8″ space around each edge. Sand the plywood to prevent splinters. Put a line of glue around the entire bottom edge of your crate. Place the plywood bottom on top. Secure it with 1″ staples or 3/4″ roofing nails. Space them about every 4 inches.
You now have the basic structure of your rustic crates! This part is easy once you get the hang of it. This diy step is crucial. You are transforming simple pallet wood into something great.
Adding Handles & Reinforcements
Your crates are taking shape! Now, let’s add some finishing touches. Handles make your crates easy to move. Reinforcements add strength and a nice rustic look.
For handles, you have many options:
Rope Handles: Drill two holes on each end of your crate. Thread a sturdy rope through the holes. Tie knots on the inside to secure it. This gives a very rustic feel.
Metal Pulls: You can find metal drawer pulls or cabinet handles at hardware stores. Screw these onto the ends of your crates. They add a more refined touch.
Cut-out Handles: If your pallet wood is thick enough, you can cut handholds directly into the end pieces. Use a jigsaw for this.
Reinforcements are also a good idea. Corner braces, either metal or wood, add extra strength. They also give your crates a more finished, industrial look. Just screw them into the corners. This makes your diy wood pallet crates even sturdier for all your storage needs. You are almost done with your beautiful, functional crates!
Finishing Your Rustic Crates
You have built your basic crates. Now, make them truly shine! Finishing your crates protects the wood. It also lets you match them to your home decor. This step adds a lot of character to your diy pallet crates.
Sanding for a Smooth Finish
Sanding is very important. It makes your pallet wood smooth. This prevents splinters. It also prepares the wood for stain or paint. You want a clean surface.
Here is the sandpaper grit sequence you should use:
60 grit: Start with this coarse grit. It levels rough fibers. It removes grime from the
palletwood.100 grit: Follow with this intermediate grit. It smooths uneven areas. It removes scratches from the coarser grit.
220 grit: Finish with this fine grit. It prepares the wood for stain, paint, or sealer. This ensures a clean, consistent finish.
Sanding makes your crates feel good to the touch.
Stains, Paints & Sealants
Now, add color and protection to your crates. You have many options to match your home’s style.
For a natural look, use wood stain. Popular rustic wood stain colors include:
Mocha: A dark brown with a subtle shine.
Gray: Gives a peaceful, modern look.
Jacobean: Slightly darker than mocha, with golden hues.
Honey: A lighter, yellowish tone that brightens rooms.
Barnwood: Offers a weathered, muted,
rusticappearance.Clear: Preserves the wood’s natural color.
You can also paint your crates. Distressed paint gives a vintage feel. After staining or painting, apply a sealant. This protects your crates from moisture and wear.
Consider these durable, non-toxic sealants:
Outdoor Defense Oil: This is an all-natural mix. It works for both inside and outside
crates. It seals moisture out of wood. It resists mold and temperature changes.Rubio Monocoat Hybrid Wood Protector: This is a modified linseed oil and wax. It protects from water and UV rays. It has zero-VOCs.
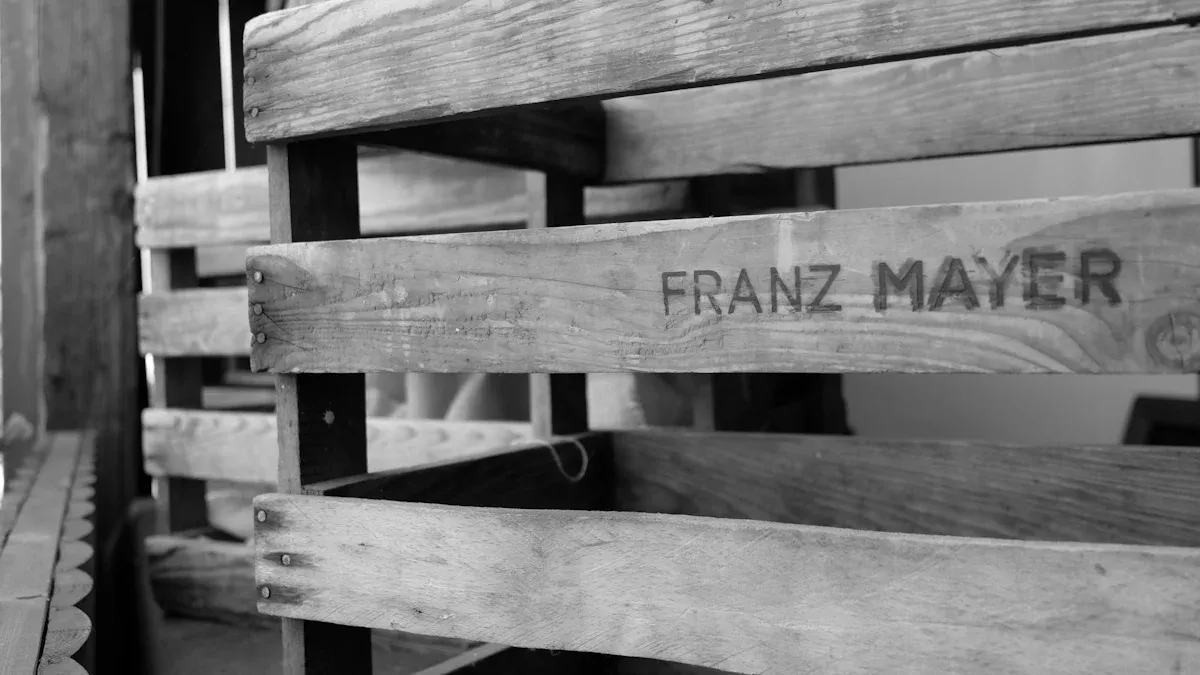
Personalizing with Embellishments
Make your crates unique! Personalize them with stencils or labels. This is an easy way to add charm.
You can personalize crates fearlessly. Use paint, stencils, or unique wood finishes. Here are some ideas for stencils:
“Locally Grown Herbs”
“Wild Flower Seeds”
“Fresh Cut Flowers”
“10 LB.” for crate ends.
Stenciling Process:
Position your stencil with masking tape.
Dip your stencil brush into paint. Remove most paint onto a rag. The brush should feel dry.
Tap or swirl paint through the stencil.
Tips for Stenciling:
You can stencil before or after you assemble your
crates.Use all subtitles on stencils. Use different sides of the
crates.A dome-tipped stencil brush works best.
These ideas help you create truly custom diy crates.
Creative Uses for Wood Crates
You have built and finished your diy wood pallet crates. Now, let’s explore how you can use them! Using wood crates adds a unique touch to any room. These crates offer affordable furniture hacks. They are budget-friendly and beginner-friendly. You can transform simple pallet wood into stylish solutions.
Living Room Decor & Storage
Your living room is a great place for crates. You can create many creative ideas for storage and display.
Coffee Tables: You can make a fantastic coffee table. Use four identical pine crates. Secure them together with 1-1/4 inch screws. Cut a plywood bottom, 29-1/2 inches by 29-1/2 inches. Make it slightly smaller on each side. Attach it with 1-1/4 inch screws. The center of the table stays open. You can fill it with extra slats. Recess these slats just below the top. Secure them with glue. Add caster wheels to the bottom for easy movement. This gives you a rustic coffee table with built-in storage.
Shelving: Stack crates to create instant shelves. Four vintage crates on a kitchen counter can replace planned floating shelves. You can also use a board for anchoring your crates as shelves. This gives a unique twist.
Modular Shelving Unit: Build a modular shelving unit. Think of diy yarn storage shelves. You can customize the size and layout.
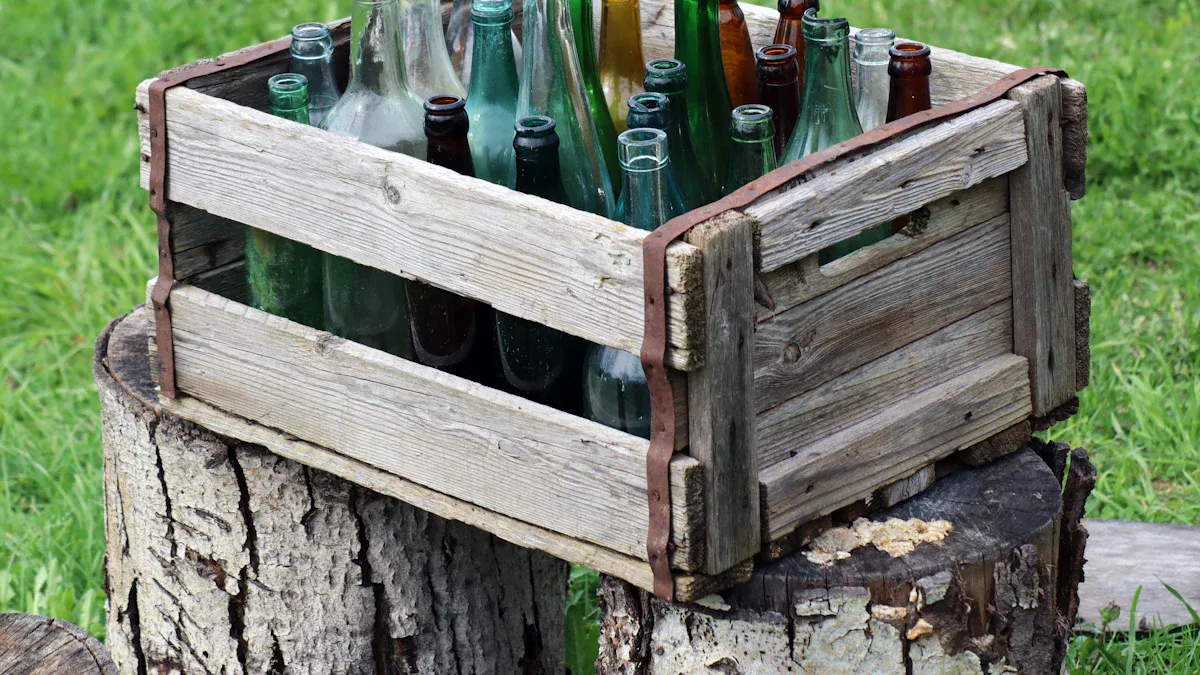
Magazine Holders: Use crates for magazine storage. Vintage wooden milk and soda crates often have compartments. These are perfect for magazines or small display items.
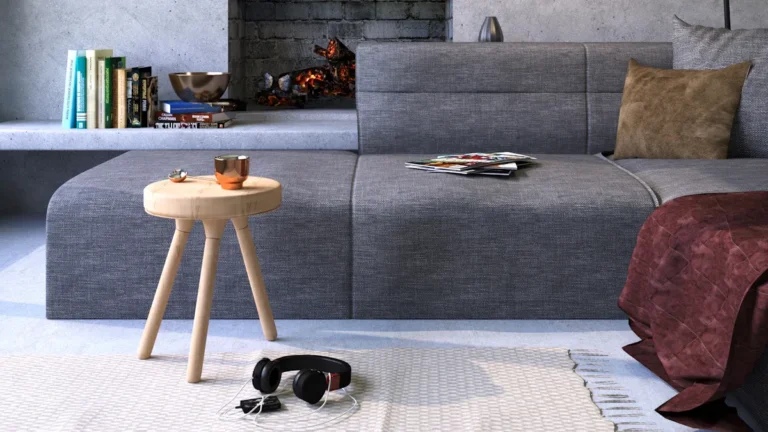
Sofa Table: Combine wooden crates with a long shutter. This creates a charming sofa table.
Side Table: Repurpose a pallet crate into a side table. Add casters and a sturdy cardboard bottom. Wrap the cardboard in fabric. This makes a functional and stylish piece.
These decorating ideas bring a rustic theme to your living room.
Bedroom Organization with Crates
Crates are perfect for bedroom storage and display. They help you keep things tidy.
Nightstands: Build a diy nightstand. You need two wood crates and one wood board. The board should be slightly wider than the crates.
Sand the crates and the top wood piece.
Apply Minwax Puritan Pine stain for a nice look.
Use wood glue and clamps to bond the wood pieces. Glue the top board to the crates. Glue the crates together.
Secure the assembly with short, fat screws. This prevents piercing through the thin wood.
Attach hairpin legs to the bottom. This gives you a stylish nightstand with open storage.
Under-Bed Storage: Slide crates under your bed. They are great for storing extra blankets, shoes, or seasonal clothes. Add wheels to the bottom for easy access.
Bookcases: Create a pallet bookcase. You can customize the size and layout. Arrange crates to fill an entire wall. This gives you lots of storage. You can also assemble multiple crates into a larger shelving unit. Try making a square shape using four crates. Place some vertically and some horizontally. Securely attach crates to the wall. This avoids taking up floor space. If you fill a tall shelf with books, anchor it to the wall. This prevents it from falling.
Decorating with crates in your bedroom is both practical and charming.
Kitchen & Dining Solutions
Your kitchen and dining areas can also benefit from crates. They offer practical storage and beautiful display options.
Pantry Storage: Use crates in your pantry. They help organize canned goods, dry foods, or root vegetables.
For regular dusting, use a dry microfiber cloth.
For spills, use a slightly damp cloth with a mild cleaner.
Immediately wipe the wood dry after cleaning.
Avoid using harsh chemicals and excessive water. This keeps your crates hygienic for food storage.
Herb Gardens: Create a rustic herb garden. Use a shallow wooden tray to arrange small pots of herbs. Think basil, rosemary, or mint. A round mango wooden white tray with a raised edge works well. It contains spills. Add pebbles or moss between pots for a polished, natural feel.
Serving Trays: Crates make wonderful serving trays. Use them as functional centerpieces on your dining table. Fill them with seasonal fruit, flowers, and salt and pepper mills. A low-profile tray is best. It won’t be too tall. You can also use trays for organizing kitchen items on countertops. Corral olive oil bottles, spice jars, and small potted herbs. This adds a rustic theme and makes items easy to reach. A low-profile, non-slip tray is good for this. Serving trays can also feature garden-themed stenciling. Use ‘Garden Cafe’ designs for a unique look. Paint the surface and hemp oil it for durability. This makes it suitable for outdoor use. It’s easy to clean with a damp cloth. Incorporate unique garden label handles. These offer a quirky and cost-effective alternative to traditional door pulls.
Decorative Displays: Stack wooden plates or trays of various sizes. This creates a layered, rustic display. Add a small chalkboard sign or fresh herbs for a “foodie” feel.
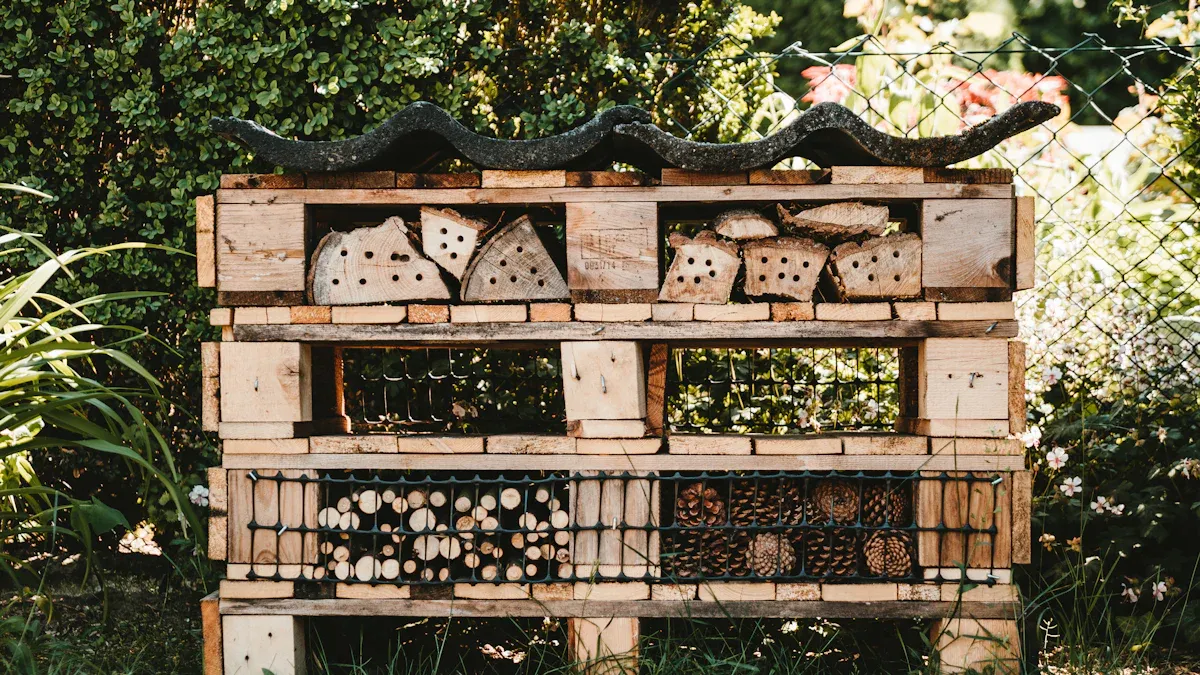
Outdoor Pallet Crate Ideas
Don’t forget your outdoor spaces! Diy pallet crates are perfect for gardens and patios.
Planters: Make colorful planters.
Gather six plain wood crates. Get spray paint in three to five colors. You also need clear sealer and two-by-two pieces of wood for support.
Spray paint the crates in your chosen colors. Cover all sides except the inside and bottom.
Once the paint is dry, apply a clear sealer. This protects the crates.
Cut two-by-two wood pieces. You need four at 44 inches and four at 34 inches. Sand the edges and stain them.
Arrange the crates and support pieces. Make sure there is space between crates for plants. This also keeps them off the ground. Drill pilot holes. Use two-inch screws to secure the crates to the support pieces.
Tool Organizers: Use crates to organize garden tools. Mount them on a shed wall or stack them near your workbench.
Patio Decor: Stack crates to create a multi-level display for potted plants or outdoor lanterns. You can also use them as small side tables on your patio.
These ideas show you how versatile diy crates are. You can add storage and style everywhere!
You’ve learned how diy wood pallet crates offer fantastic storage ideas. They are affordable, sustainable, and add rustic charm. You can create personalized home decor. Start your own diy pallet projects today. Embrace the creative freedom. Feel the satisfaction of making something unique from pallets. Share your diy pallet creations. Inspire others with your pallet crafts. These pallet storage solutions are easy diy. Enjoy the rustic beauty of pallet crafts. Your pallet journey begins now. Make more pallet items. Use every pallet piece. This pallet guide helps you.
FAQ
What kind of pallets are safe for DIY projects?
You should only use heat-treated (HT) pallets. Look for the “HT” stamp on the wood. Avoid chemically treated (MB) pallets, as they contain toxic chemicals. Always choose clean, dry pallet wood for your projects. This ensures your pallet creations are safe.
What tools do I need to disassemble a pallet?
You will need thick gloves, eye protection, and a mask. A pry bar, hammer, and saw are essential. A metal detector helps find hidden nails in the pallet wood. These tools make taking apart a pallet much easier.
What are the best ways to finish my pallet crates?
You can sand your pallet crates for a smooth finish. Then, apply wood stain for a natural look or paint them for a distressed style. Always seal your pallet wood with a clear coat. This protects your crates and enhances their appearance.
What are some creative uses for my finished pallet crates?
You can use your pallet crates as coffee tables, shelving units, or nightstands. They also work great for pantry storage, herb gardens, or outdoor planters. Your finished pallet crates offer versatile storage and decor.