

Thinking about Restoring an Old Deck? Start by looking at your deck closely. Check for weak spots and damaged boards. You want to know what needs fixing before you grab your tools.
Tip: Snap a few photos so you remember trouble spots during repairs.
Key Takeaways
Inspect your deck thoroughly before starting repairs. Look for damage, rot, and loose fasteners to create a repair checklist.
Clean your deck regularly to prevent mold and damage. Pressure wash and remove debris to keep it looking fresh and lasting longer.
Establish a maintenance routine. Inspect, clean, and reapply finishes at regular intervals to keep your deck safe and beautiful.
Deck Inspection
Before you jump into deck restoration, you need to inspect your deck from top to bottom. This step helps you spot trouble early and plan your repairs.
Assess Damage
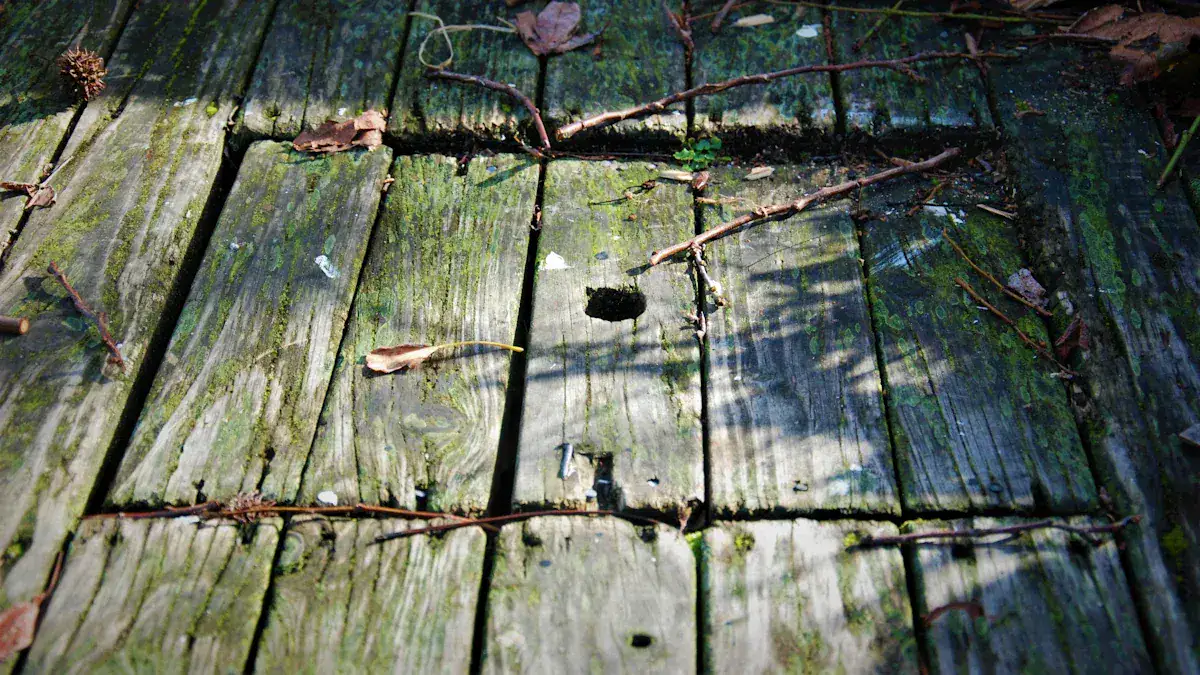
Start by looking for signs of wear and tear. You might see mold, mildew, or cracked boards. Some boards may bow or sag. Insect damage can show up as tiny holes or chewed wood. Railings might feel loose, and you could find fasteners sticking out. Use a flashlight to check dark corners and a measuring tape to see if boards are spaced right. Here’s a quick guide to tools and their uses:
Tool | Purpose |
|---|---|
Flashlight | Illuminate dark areas |
Measuring tape | Check spacing and dimensions |
Level | Make sure surfaces are even |
Moisture meter | Detect moisture in wood |
Plumb bob | Check vertical alignment |
Hammer | Test fasteners and wood strength |
Ladder | Reach high spots |
Screwdriver | Probe for rot and test fasteners |
Make a checklist of damaged spots. This list helps you stay organized during deck restoration.
Check for Rot
Rot can ruin your deck fast. Look for soft spots, discoloration, or wood that crumbles when you touch it. Use a screwdriver to poke suspicious areas. If the wood feels mushy, you probably have rot. Check the substructure, joists, and posts for moisture damage. Rot often hides under boards or near footings.
Inspect Fasteners
Loose or missing fasteners make your deck unsafe. You should inspect fasteners every year and after big storms. Look for rusted screws, nails sticking out, or gaps where boards meet.
Tip: Regular checks help you catch problems early and keep your deck safe for everyone.
Check ledger attachments and make sure bolts are secure and spaced correctly. If you see issues, add them to your repair checklist. Good inspection sets the stage for a smooth deck restoration.
Prepare and Clean Deck
Getting your deck ready for restoration means you need to focus on cleaning and safety. What should you do first? You want to clear the area. Remove furniture, grills, and planters from your deck. Sweep away leaves and dirt. This makes cleaning easier and keeps your deck safe.
Clear Area
What helps you avoid accidents? You should check for loose boards and nails before you start cleaning. Move anything that could trip you or tangle hoses. Cover plants and electrical outlets near your deck. Close windows and doors to keep water out. Always keep a fire extinguisher nearby if you grill on your deck. Use a fire-resistant mat under your grill to protect the wood.
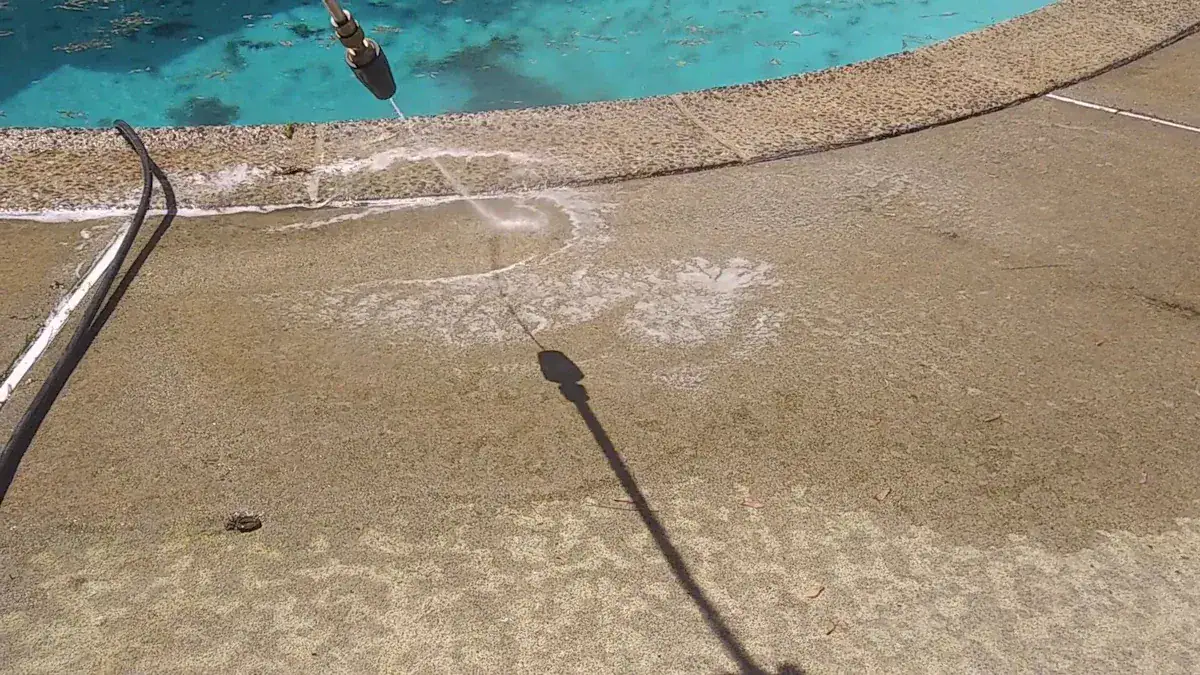
Pressure Wash Deck
What is the best way to clean your deck? Pressure washing removes deep dirt and old stains. Start by reading your pressure washer’s manual. Use a wide-fan tip for gentle cleaning. Test the spray on a hidden spot. Keep the washer at a safe distance from the wood. Apply detergent with a low-pressure nozzle before washing. Pay attention to wind direction so you don’t spray yourself. Sweep away debris before you begin cleaning.
Remove Old Finish
What cleaning products work best for old finishes? Restorative wood deck cleaners with bleach or oxalic acid lighten wood and fade stains. Defy Wood Brightener cleans and brightens weathered decks. Use a wire brush for flaking wood. Fill holes with wood filler after cleaning. Always choose cleaning products made for your deck material.
Treat Mold and Mildew
What should you do about mold and mildew? Sand away stubborn stains when the wood is dry. Wear gloves, a mask, and safety glasses for protection. Clean up after yourself to stop mold from spreading. Control moisture around your deck and improve ventilation. Use cleaning products with mold-resistant properties for better results.
Tip: Always wear ear protection, kneepads, and gloves when cleaning your deck. Safety gear keeps you comfortable and safe during cleaning.
Safety Gear/Equipment | Description |
|---|---|
Gloves | Protect your hands during cleaning tasks |
Goggles | Shield your eyes from cleaning debris |
Mask | Prevent breathing in cleaning dust |
Ear Protection | Block out loud cleaning noises |
Kneepads | Cushion your knees while cleaning your deck |
Cleaning your deck the right way helps you get the best results. You want your deck to look fresh and last longer. Regular cleaning and safety checks make your deck a great place to relax.
Repair and Restore Your Deck
Restoring an old deck is a rewarding diy project. You want your deck to look great and last for years. What steps should you take to repair and restore your deck? Let’s break it down.
Replace Damaged Boards
What materials work best when you need to swap out old boards? You can choose from several options:
Composite decking lasts up to 30 years. It resists warping, rotting, and insects. You don’t need to stain it.
PVC decking offers high performance and needs little upkeep. It stands up to moisture and bugs.
Ipe wood is very strong and dense. It lasts a long time but needs more care.
Composite and PVC boards are easier to maintain than wood. They keep your deck looking fresh.
When you replace damaged boards, make sure they fit snugly. Secure them with the right fasteners. This step helps you restore your deck and keeps it safe.
Fix Fasteners
What fasteners should you use for deck restoration? You want your deck to stay sturdy and safe. Here are some top choices:
Stainless steel fasteners resist rust and corrosion.
Composite deck screws work well with composite boards. They last longer and don’t rust.
Hidden fastening systems give your deck a smooth look.
Structural screws add strength for heavy loads.
Coated fasteners protect against moisture and rust.
Check all fasteners. Tighten loose screws and replace any that look worn. This repair step helps your deck stay strong.
Sand Deck Surface
What grit sandpaper should you use before you stain or seal your deck? Sanding makes your deck smooth and ready for a new finish.
Start with 80-grit sandpaper for most decks. If your deck is very rough, use 36 or 60 grit first.
Move to 80-100 grit to smooth out the surface.
Finish with 120-150 grit for a nice, even feel. Don’t use anything finer, or the stain won’t soak in well.
Sanding removes splinters and old paint. It helps you restore your deck and get it ready for the next step.
Apply Deck Stain or Sealer
What type of stain or sealer works best for deck restoration? You want a finish that lasts and protects your deck. Here’s a quick look at your options:
Type of Stain | Durability Characteristics |
|---|---|
Oil-Based Stains | Penetrate deeply, last longer, and protect against sunlight and moisture. |
Water-Based Stains | Less durable, need more frequent reapplication, and can fade from sunlight and rain. |
Pick a stain or sealer that matches your deck material. Apply it evenly with a brush or roller. Let it dry fully before you walk on your deck. This step helps you restore your deck and keeps it looking good.
Tip: Always check the weather before you stain or seal your deck. Dry, mild days work best.
Maintain Drainage
What should you do to keep water from damaging your deck? Good drainage is key for deck restoration. You want water to flow away from your deck, not pool on it.
Make sure gaps between boards are clear.
Clean out debris from under your deck.
Check that water runs off and doesn’t collect in low spots.
Fix any areas where water pools.
Proper drainage stops moisture problems. It keeps your deck from warping, splitting, or rotting. You want your deck to stay strong and look great for years.
Note: Regular checks for drainage help you avoid costly repairs and keep your deck in top shape.
Restoring your deck means you replace damaged boards, fix fasteners, sand the surface, apply a strong finish, and maintain drainage. These steps help you repair and restore your deck so you can enjoy it for seasons to come.
Tips for Restoring an Old Deck
Establish Maintenance Routine
What does a good maintenance routine look like for restoring an old deck? You want to keep your deck in top shape all year. Here’s a simple table to help you remember the most important tasks and when to do them:
Maintenance Task | Frequency/Timing |
|---|---|
Inspect the deck | Twice a year (spring and fall) and after storms |
Clean the deck | Spring and fall |
Seal the deck | As needed, usually in fall |
Repair any damage | As soon as you spot it |
Remove snow and ice safely | Whenever needed during winter |
A regular routine helps you catch problems early. You save money and keep your deck safe for everyone.
Regular Cleaning
What cleaning schedule works best for restoring an old deck? You should clean your deck in spring to remove winter dirt and mold. Summer brings more foot traffic, so another cleaning helps. Fall is the time to clear leaves and debris before winter. If your deck gets heavy use or faces harsh weather, clean it more often. Wooden decks need at least one deep clean each year. Composite decks also benefit from an annual wash.
Clean in spring for a fresh start.
Clean in summer to handle extra use.
Clean in fall to prep for winter.
Regular cleaning keeps your deck looking great and prevents damage.
Reapply Finish
What is the right schedule for reapplying finish during deck restoration? You want to protect your deck from sun and rain. Clear finishes need reapplying every year. Semi-transparent stains last two to three years. Solid-color finishes can last up to five years. Check your deck each year. If water stops beading on the surface, it’s time to reapply. This step keeps your deck strong and beautiful.
Type of Finish | Reapplication Schedule |
|---|---|
Clear finishes | Annually |
Semi-transparent stains | Every 2 to 3 years |
Solid-color finishes | Every 3 to 5 years |
Tip: Add lighting, planters, or outdoor rugs to turn your deck into a backyard showpiece. These tips for restoring an old deck help you create a space you love.
Restoring your old deck means you inspect, clean, repair, and maintain it. You avoid common mistakes like ignoring structure or choosing poor materials. A restored deck boosts your home’s value and saves money compared to building new. You help the environment by reducing waste. Share your deck stories or ask questions below! 😊
FAQ
What tools do you need to restore an old deck?
You need a pressure washer, sander, screwdriver, hammer, safety gear, and a paintbrush. These tools help you clean, repair, and finish your deck.
What is the best time of year to restore a deck?
Spring or early fall works best. You get mild weather and less rain. Your deck dries faster, and you avoid extreme heat or cold.
What should you do if you find mold on your deck?
Clean the area with a mold remover. Wear gloves and a mask. Let the deck dry fully before you apply any finish or stain.
